Lately I have been involved in the creation of several NuGet packages useful for some portals being developed. I want to share my knowledge in this topic.
If we were developing libraries for .NET Core or .NET Standard life would be easy as figure 1 to figure 8 shows.
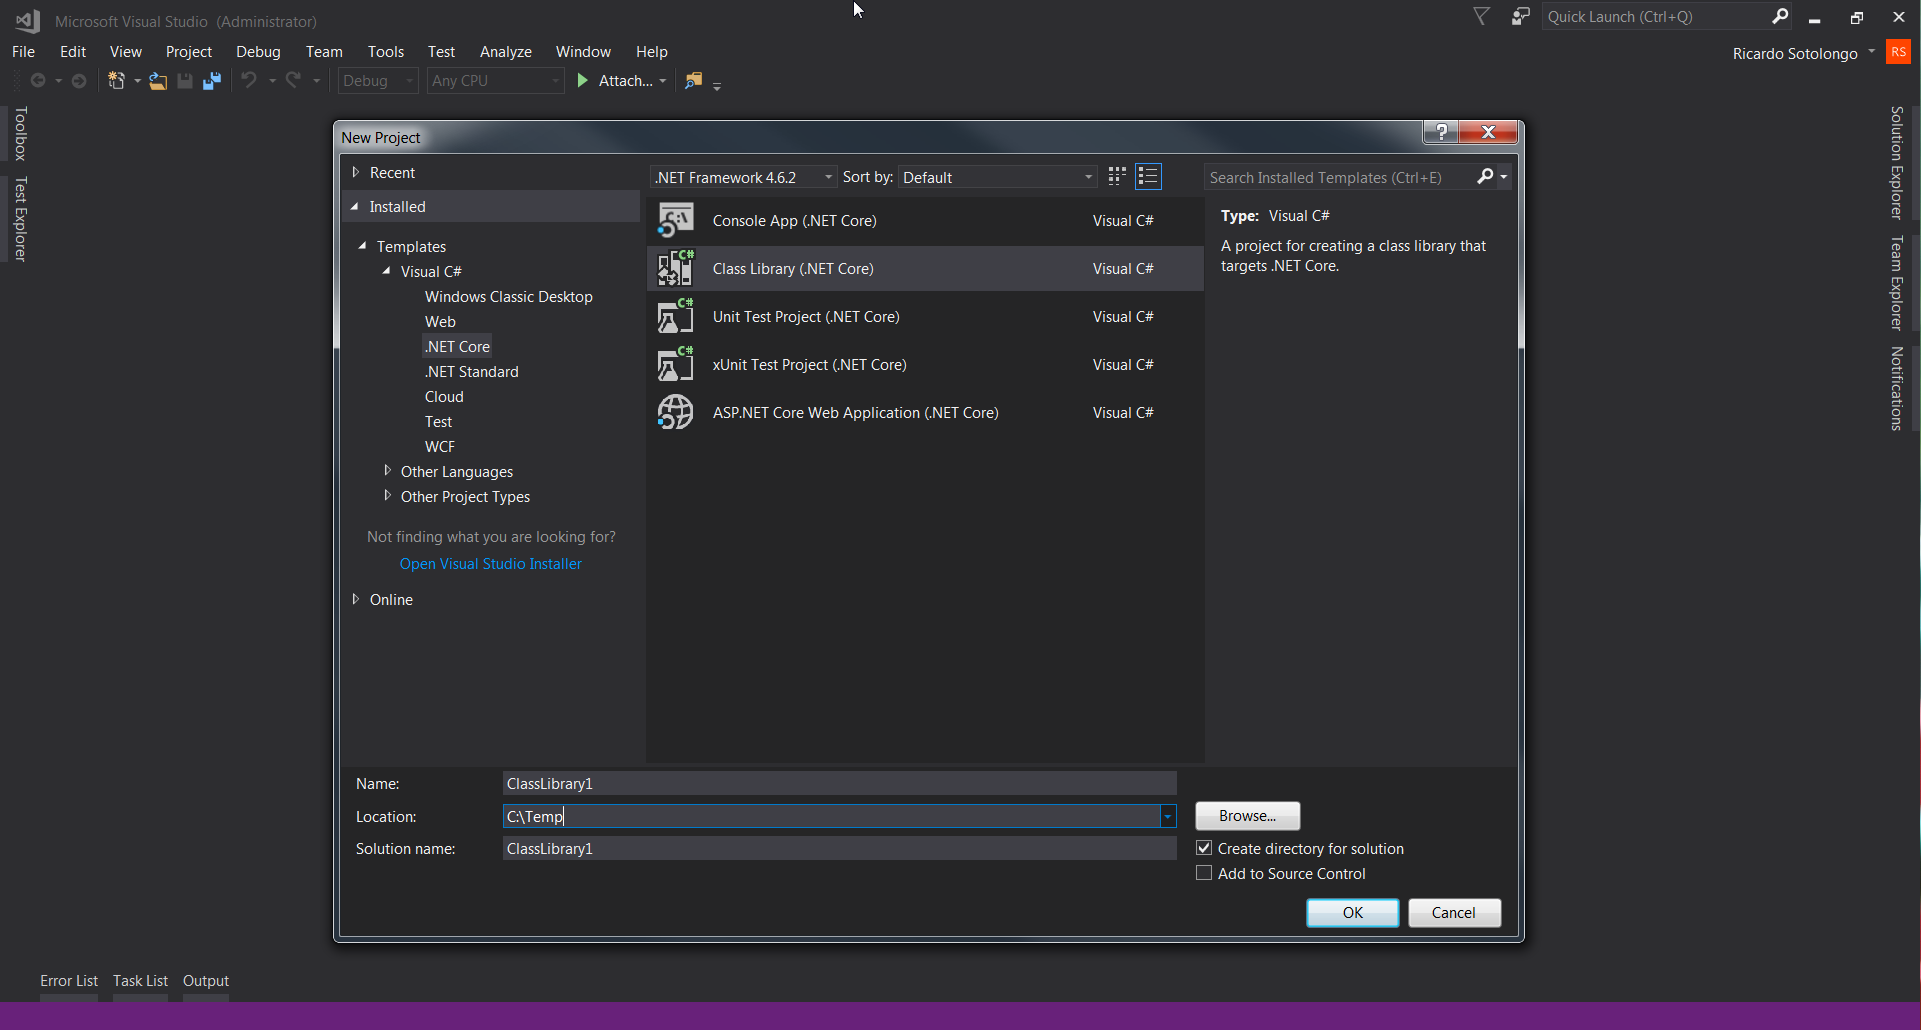
Figure 1: “Creating a new .NET Core library”.
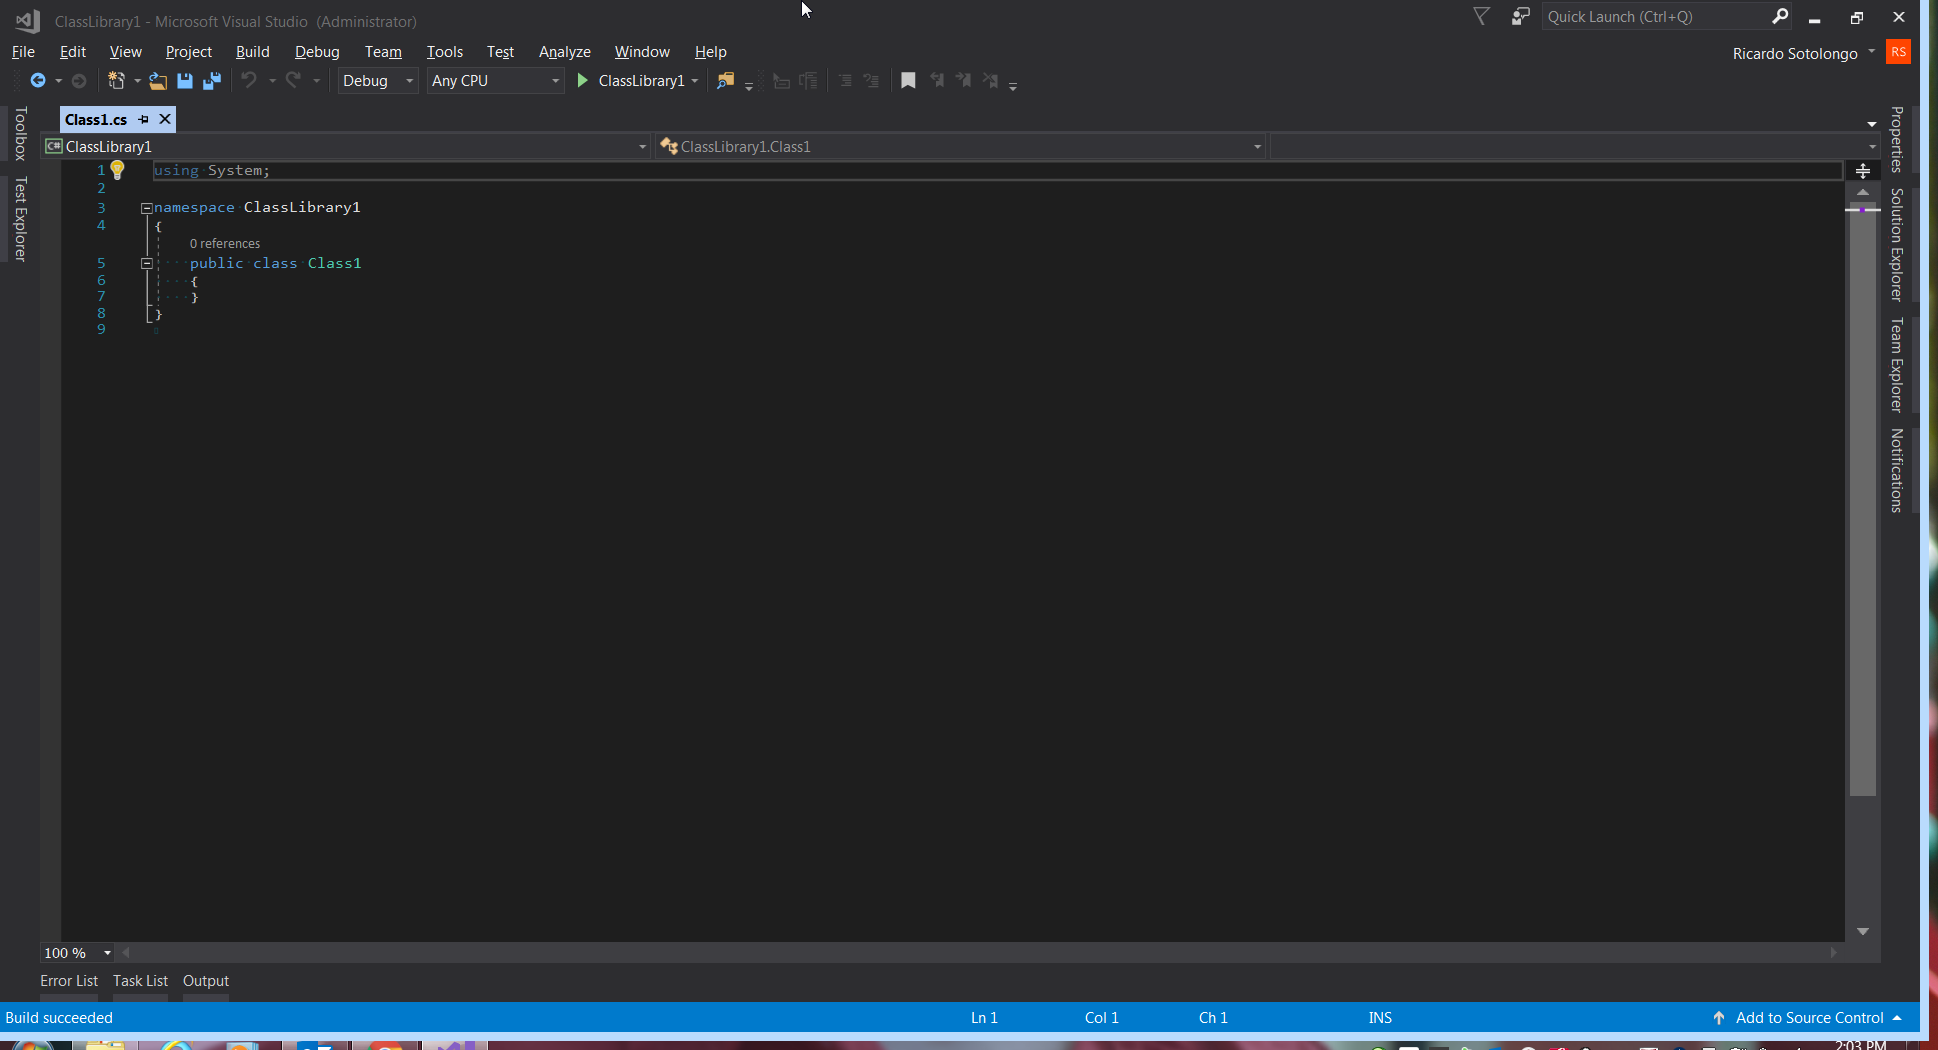
Figure 2: “Default code”.
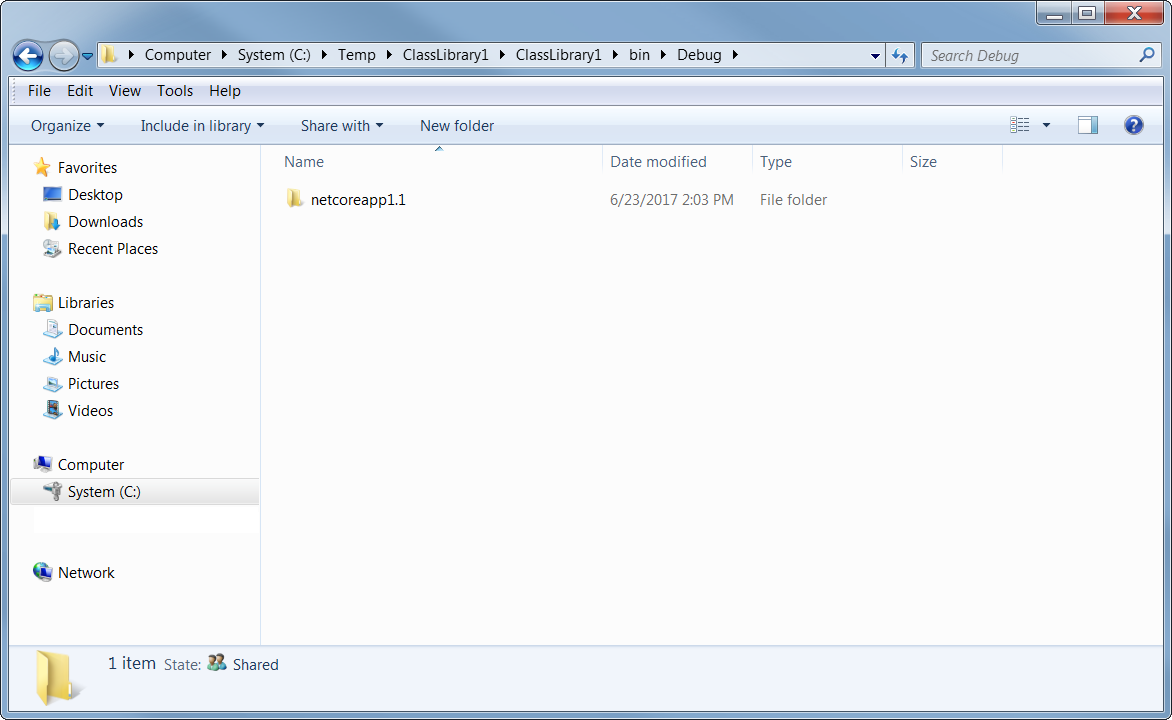
Figure 3: “First build results”.
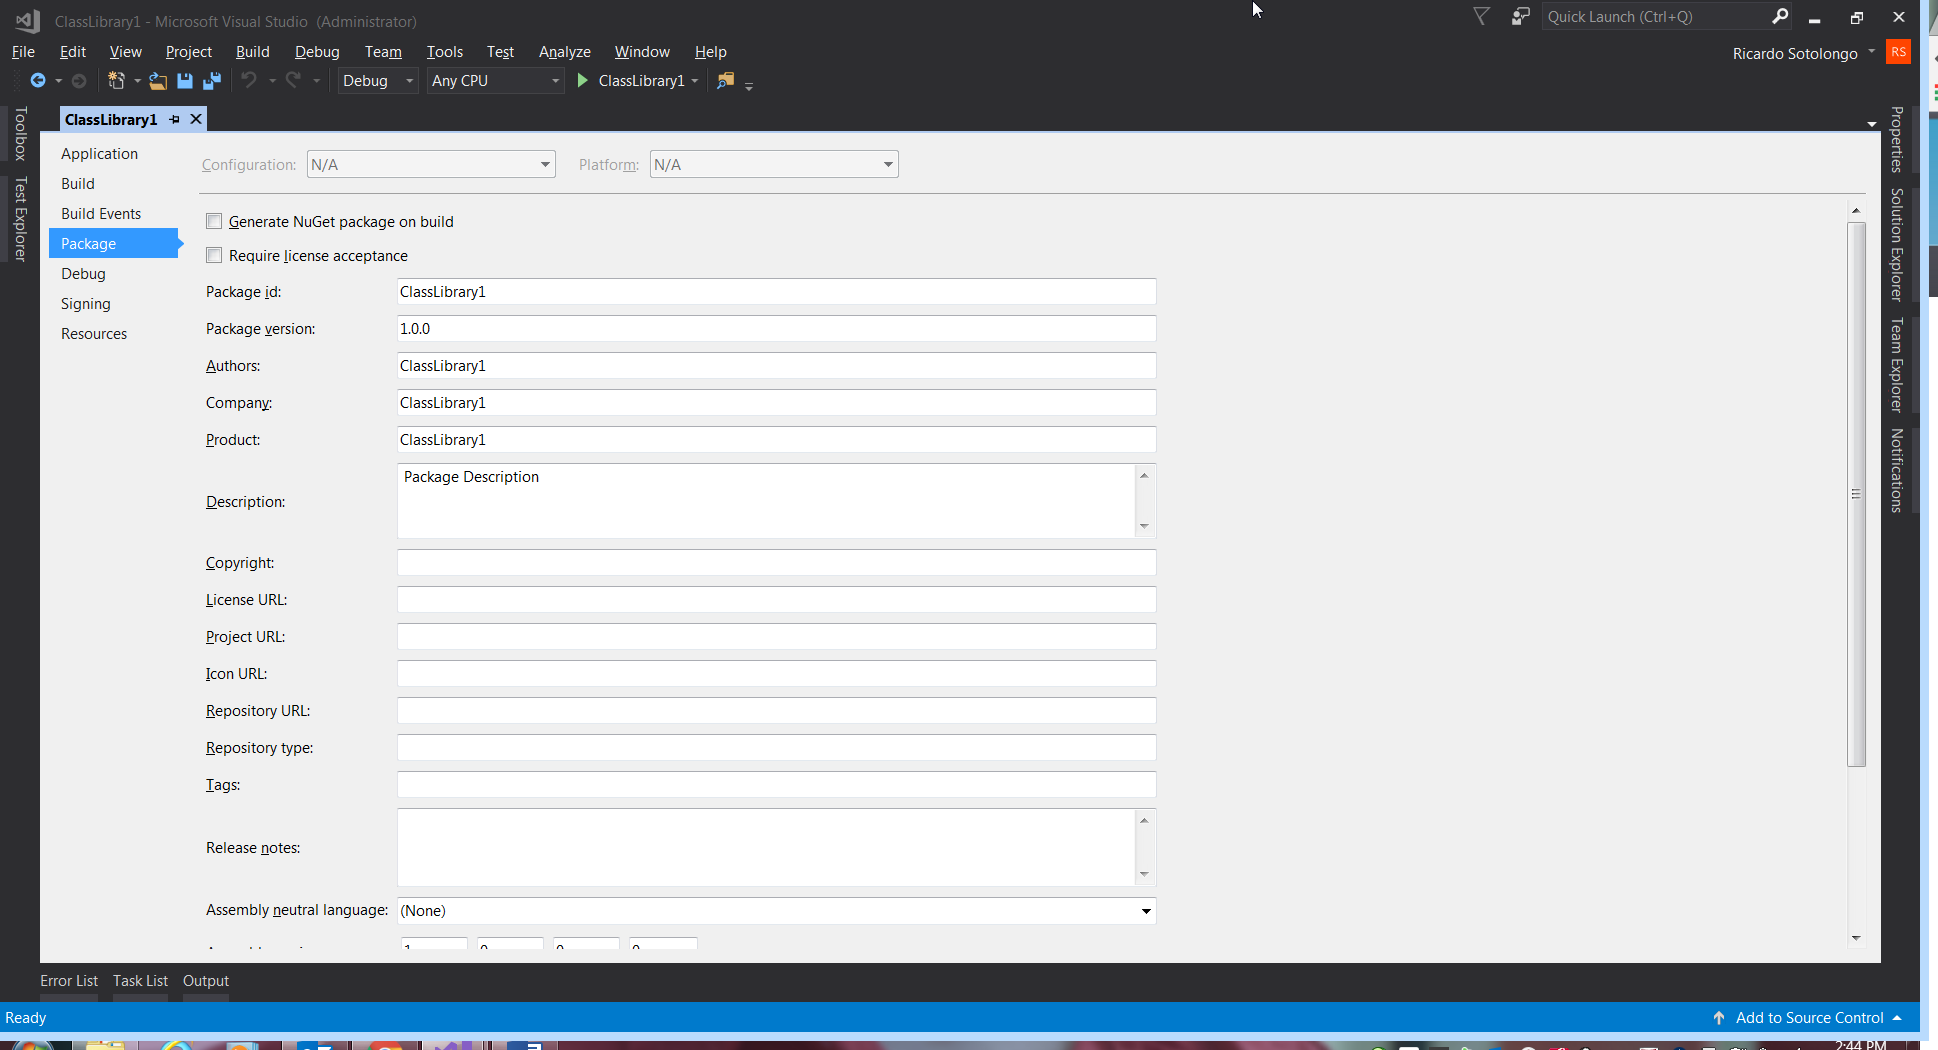
Figure 4: “Project properties”.
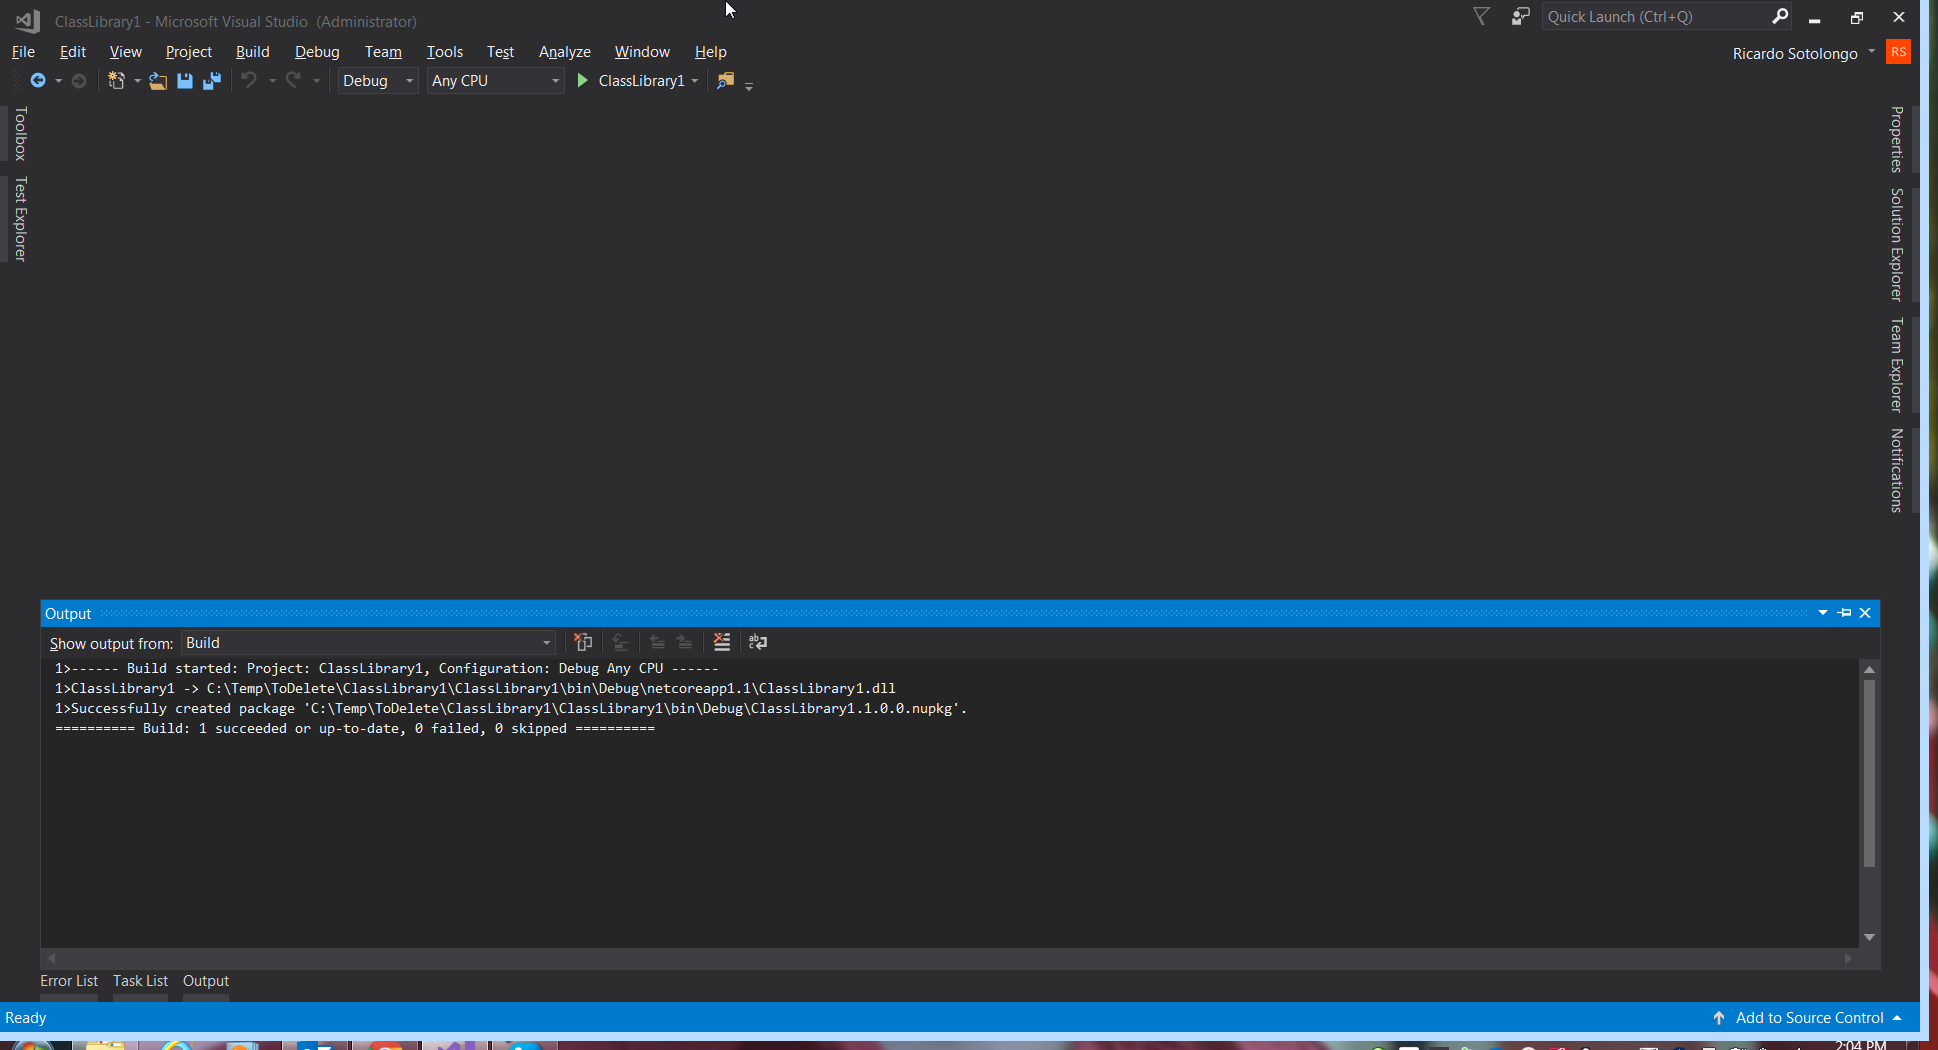
Figure 5: “Second build output”.
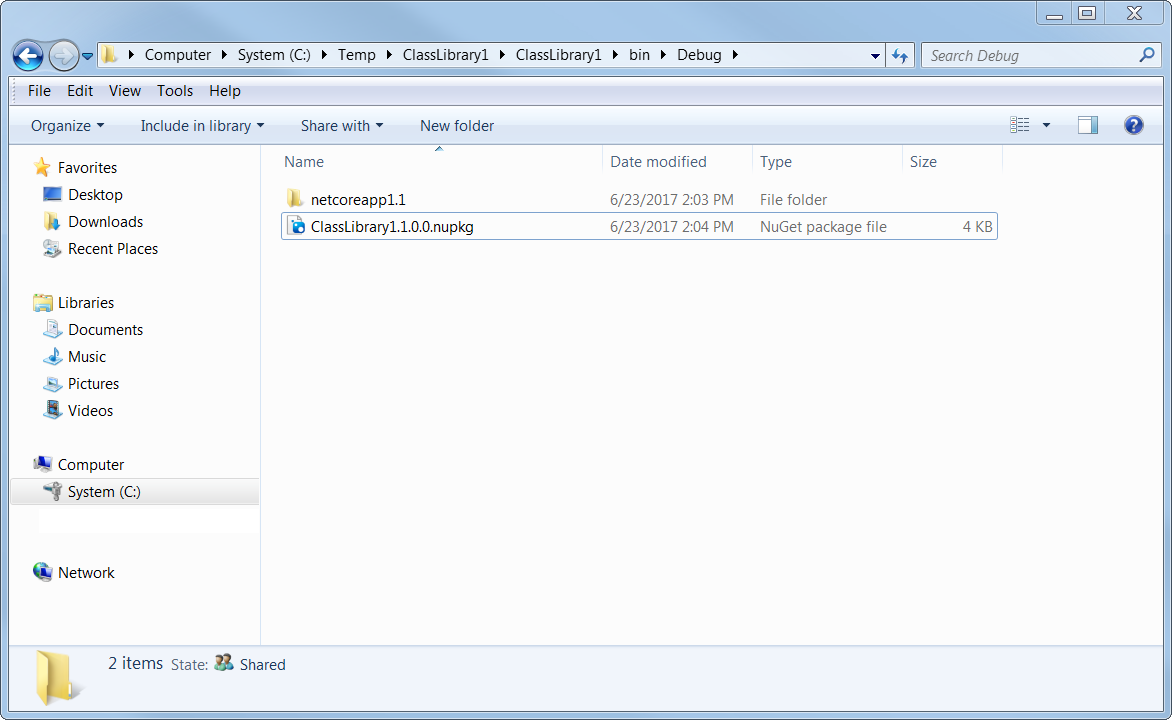
Figure 6: “Second build results”.
But, life is not so easy and almost all our products use the .NET Framework (regular) meaning that Visual Studio don’t offer us such capabilities as figure 7 and 8 show.
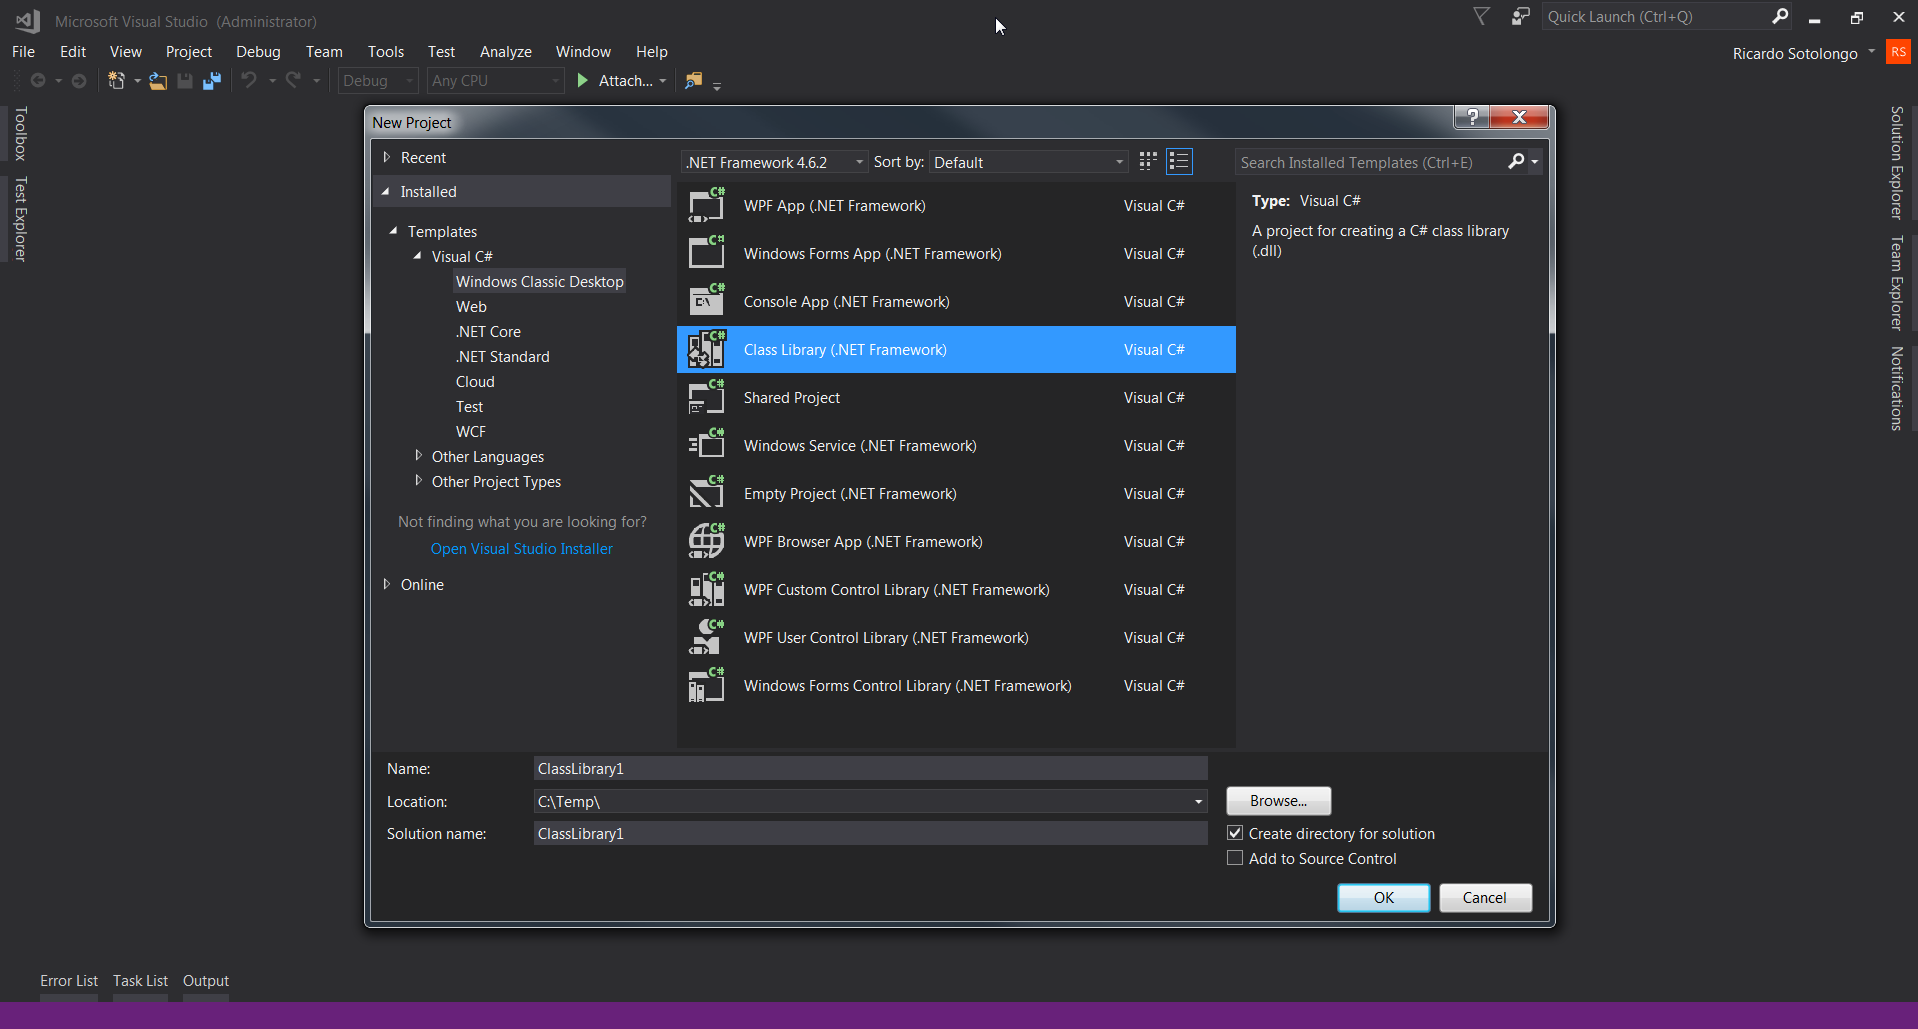
Figure 7: “New .NET Framework Library”.
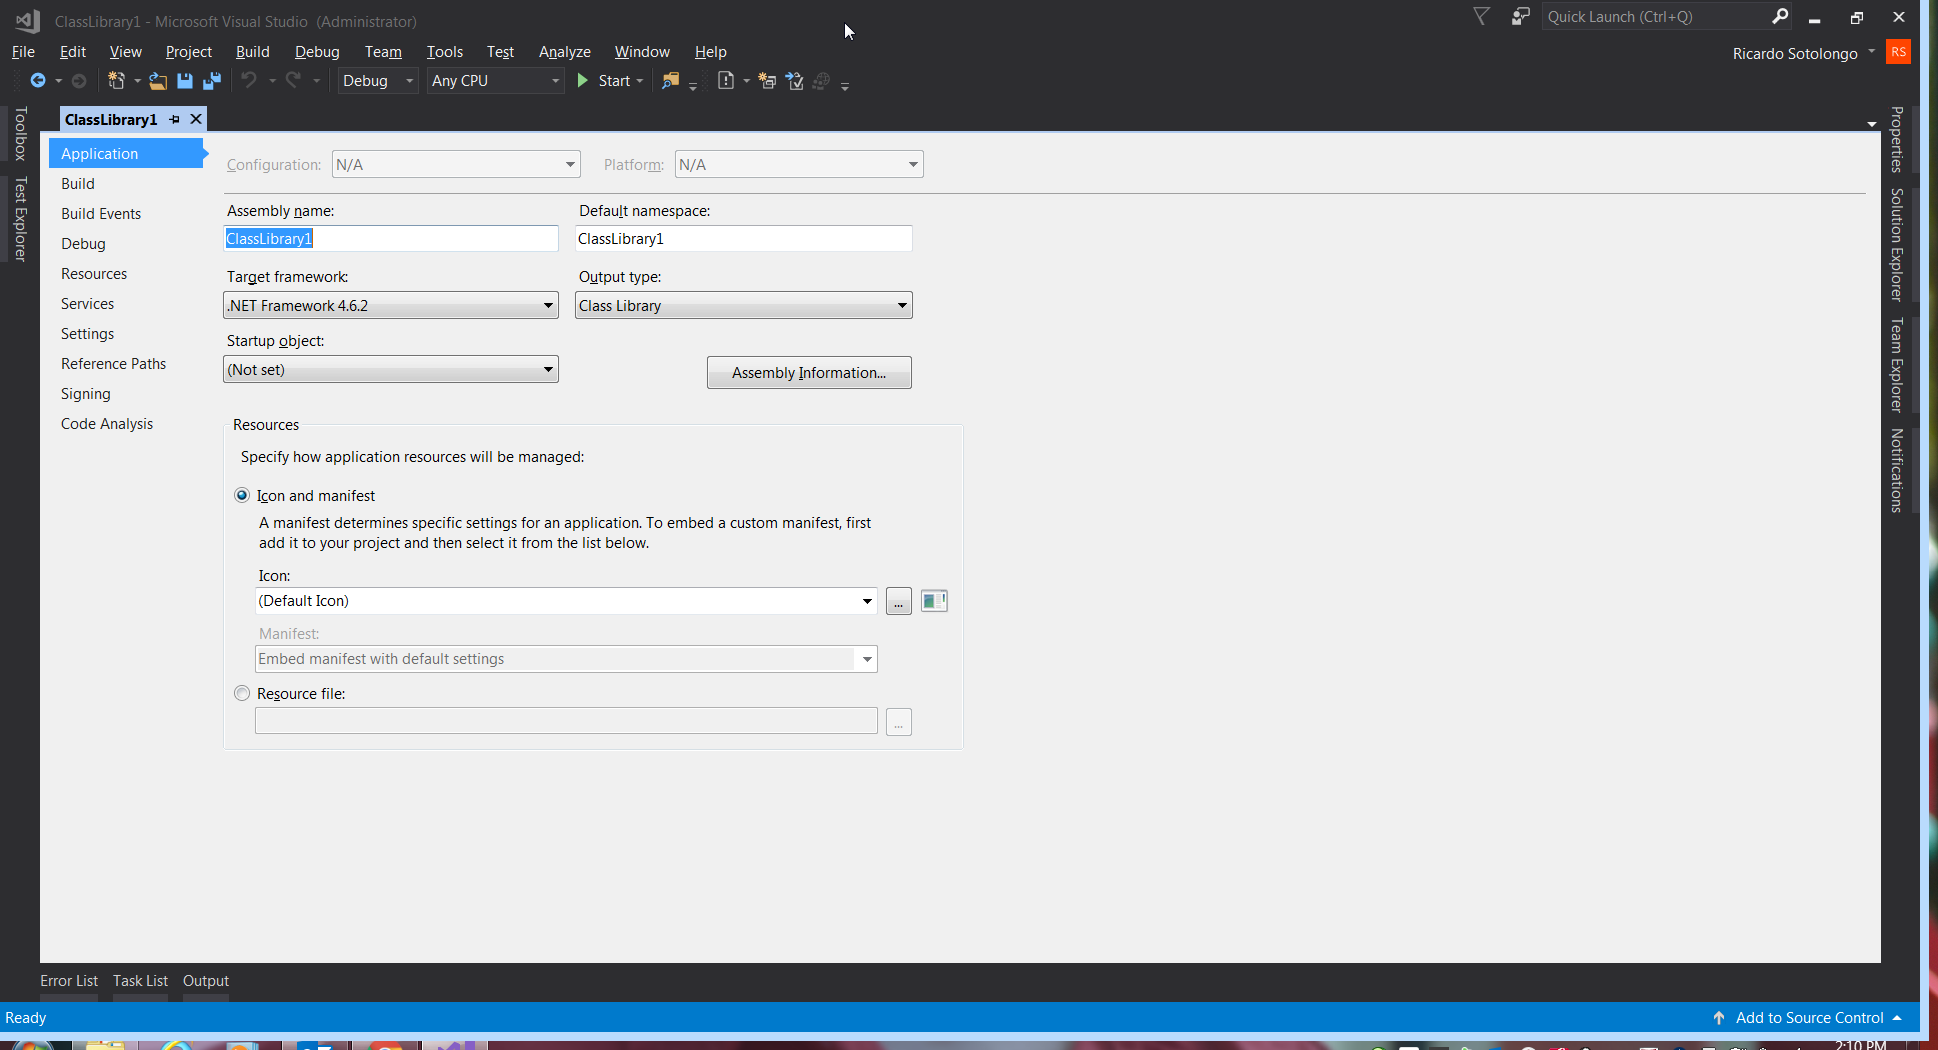
Figure 8: “Properties for this kind of projects don’t include the Package feature”.
So, what alternative we have? Actually few of them: use Octopus to generate the package but this tricky due to Octopus use a custom made build of NuGet.exe, so the generated structure could not match and involve much steps to obtained.
Other alternative is use “NuGet.exe” manually from the command line but this can be confusing and also involve many other steps to accomplish.
I said once but I like to repeat it, I love NuGet packages, so, why not use a NuGet package to generate NuGet packages? Well, it already exists and is very easy to use. The first step is to add the package: “CreateNewNuGetPackageFromProjectAfterEachBuild” to the project that we want to distribute as a NuGet package. Figure 9 shows an example.
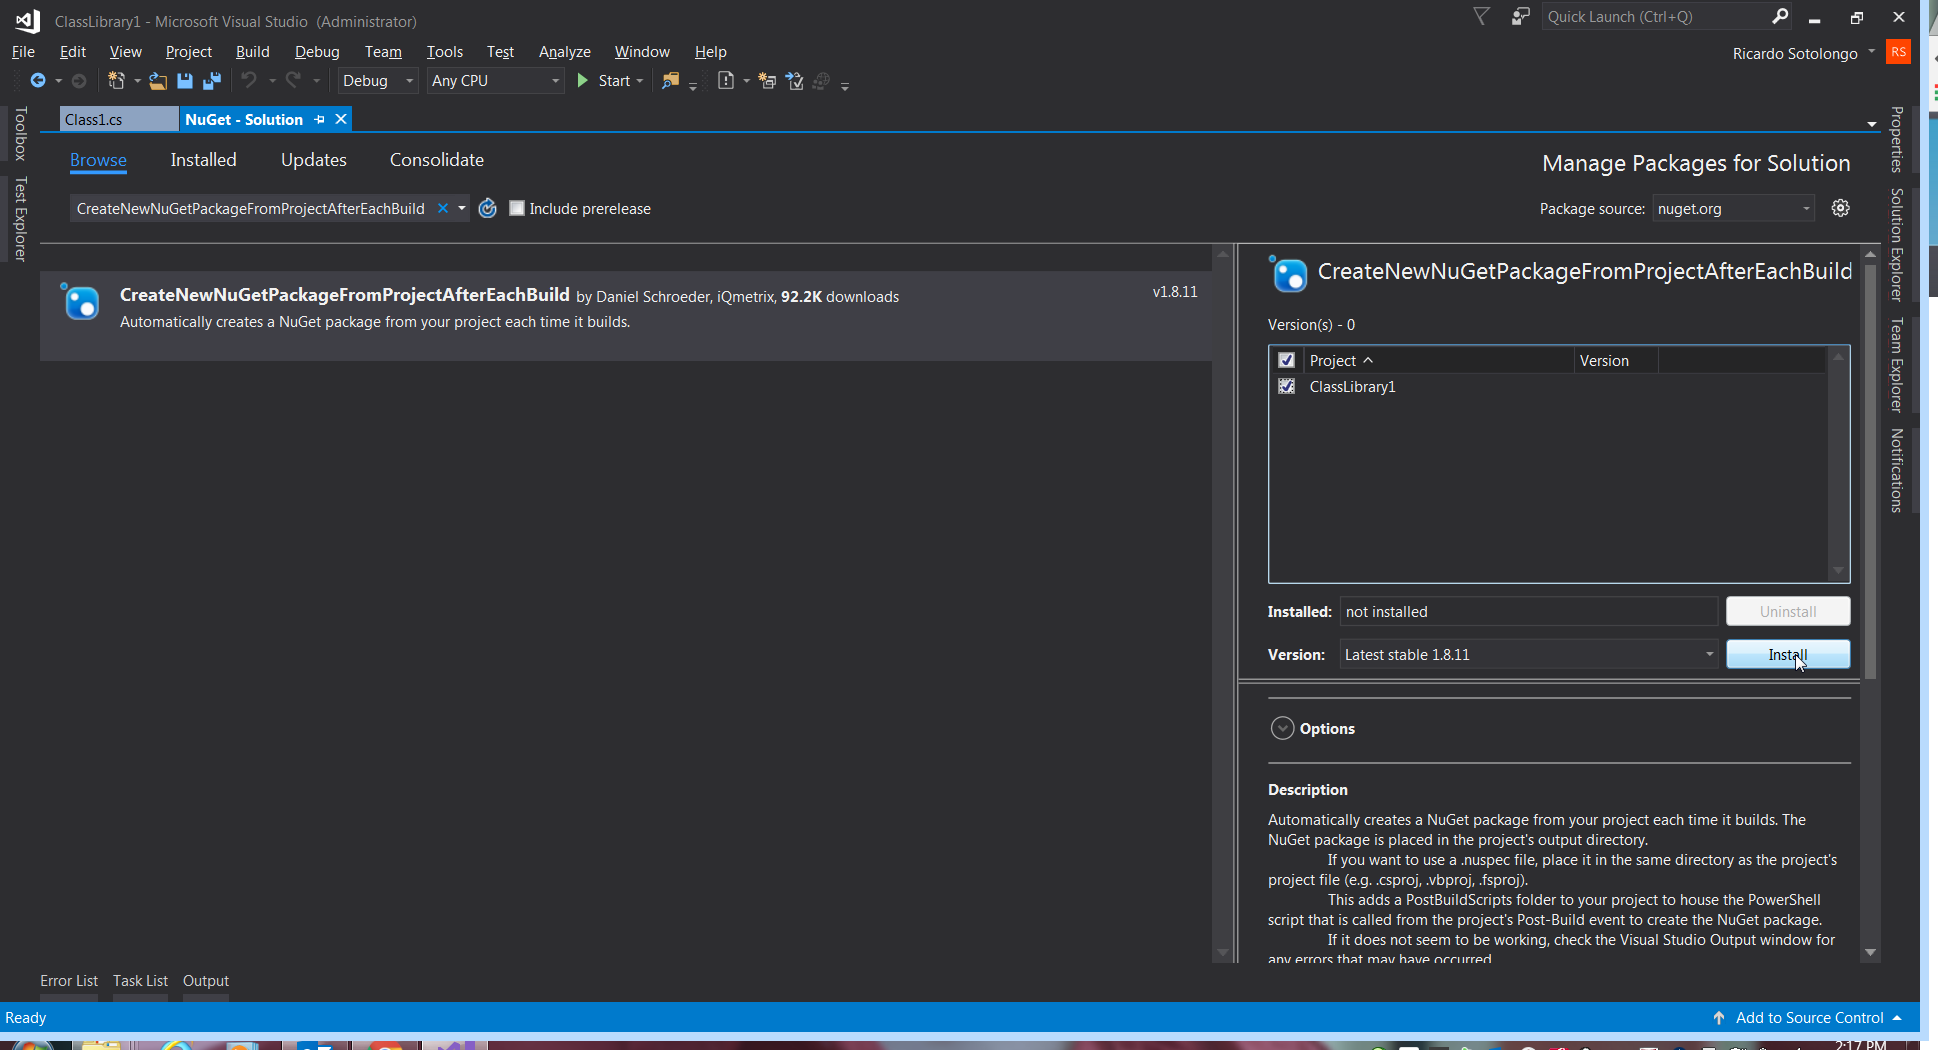
Figure 9.
After been added this package creates a directory inside the project root called: “_CreateNewNuGetPackage” and pretty much that’s is all you need. Figure 10 shows the structure created.

Figure 10.
Once we build the project we can see the output in figure 11.
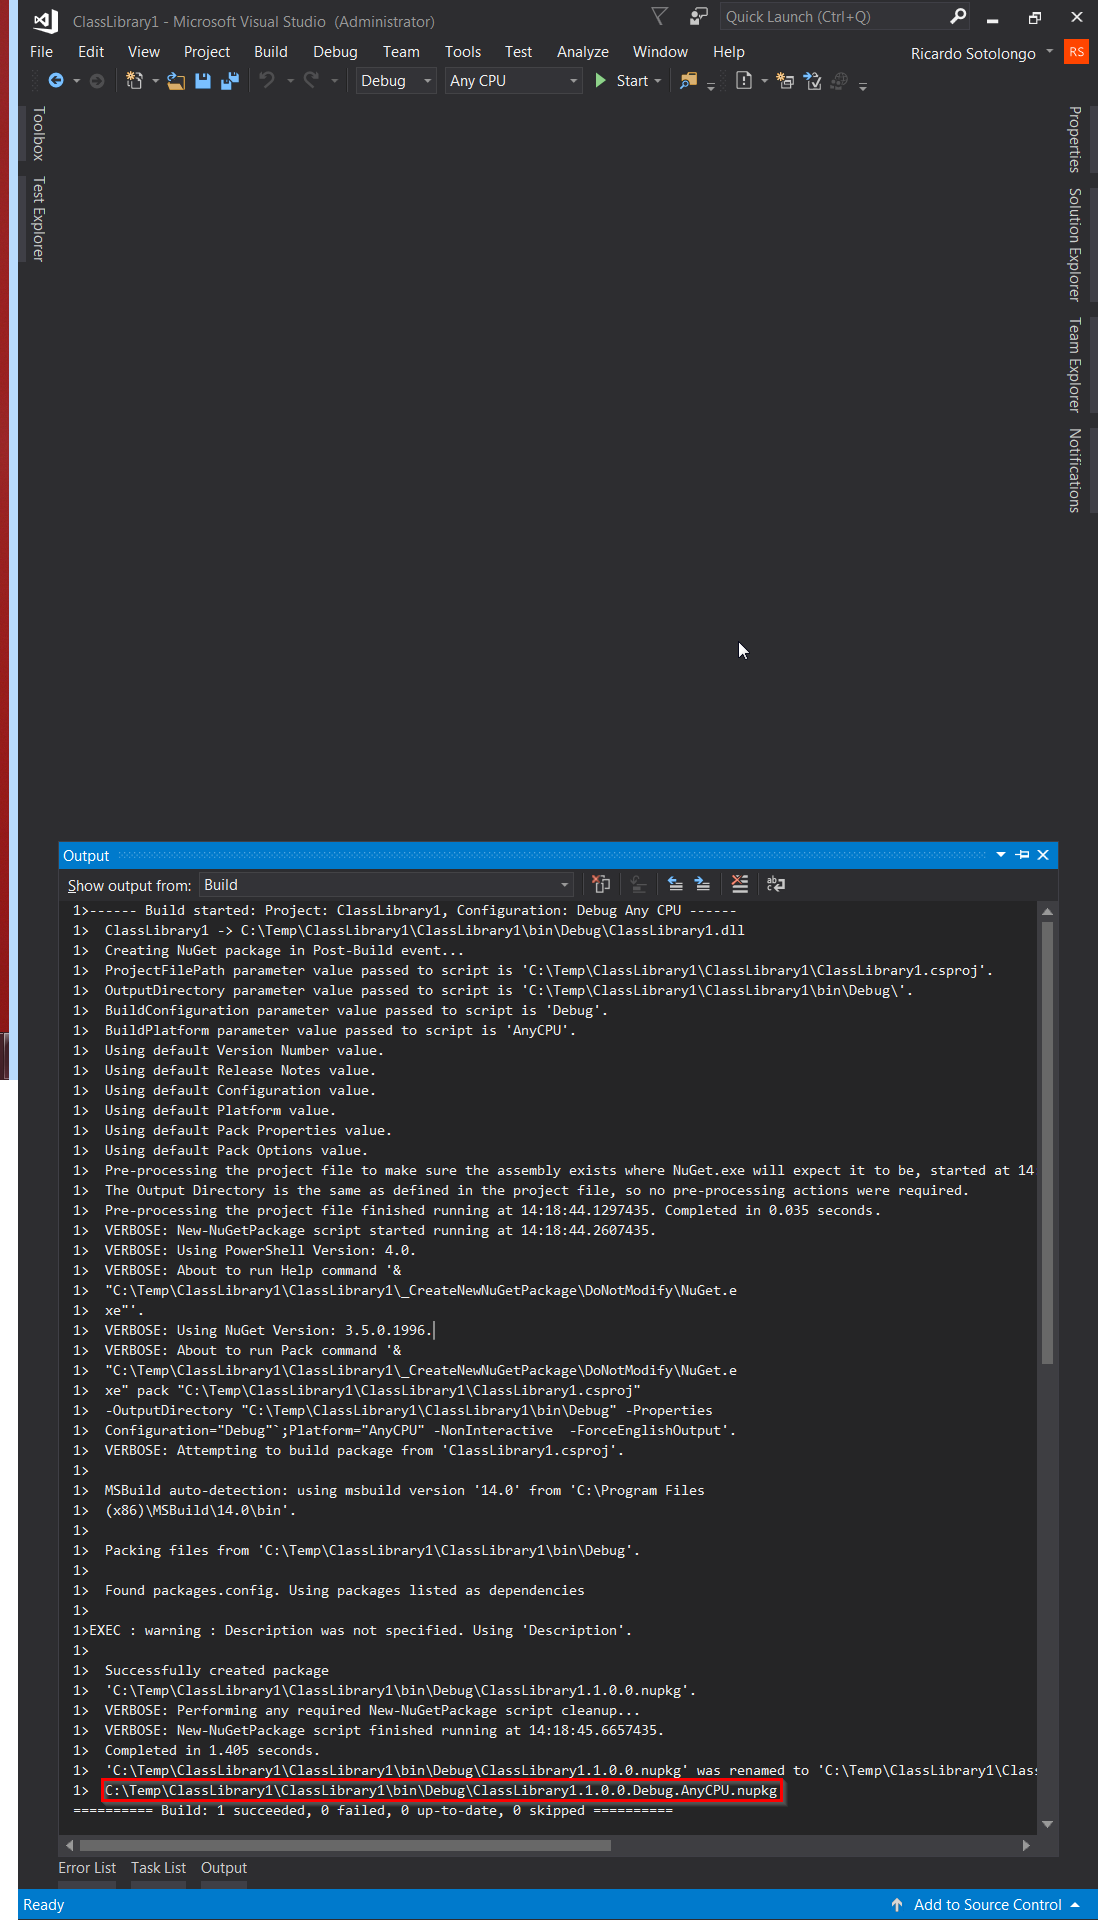
Figure 11.
Figure 12 shows the build results.
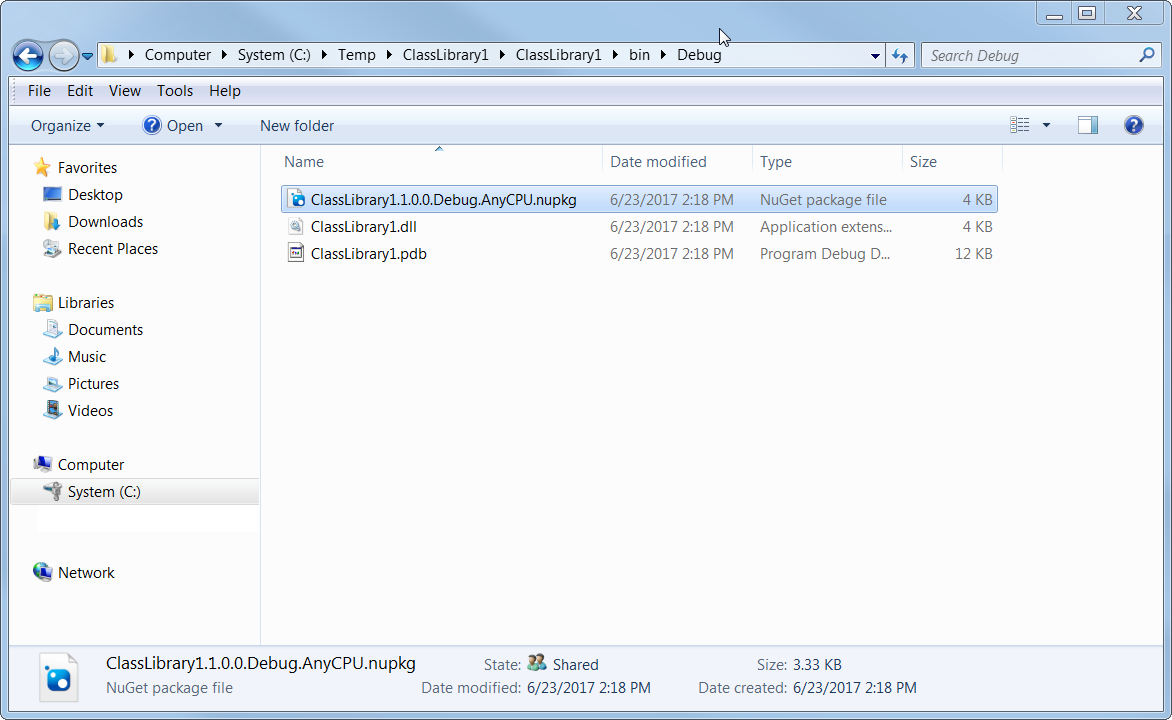
Figure 12.
Figure 13 shows the content of the generated package.
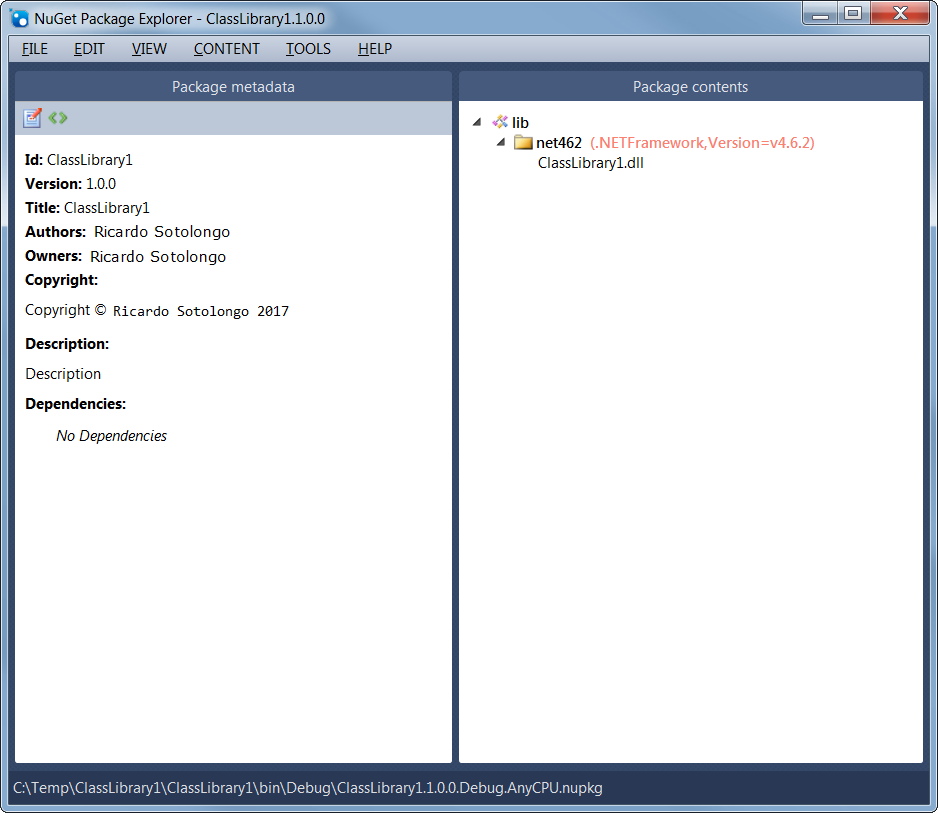
Figure 13.
Notice that metadata is basically extracted from the assembly info or auto generated (the build output also have logs about this). We can change this if we include a metadata file as Figure 14 shows.
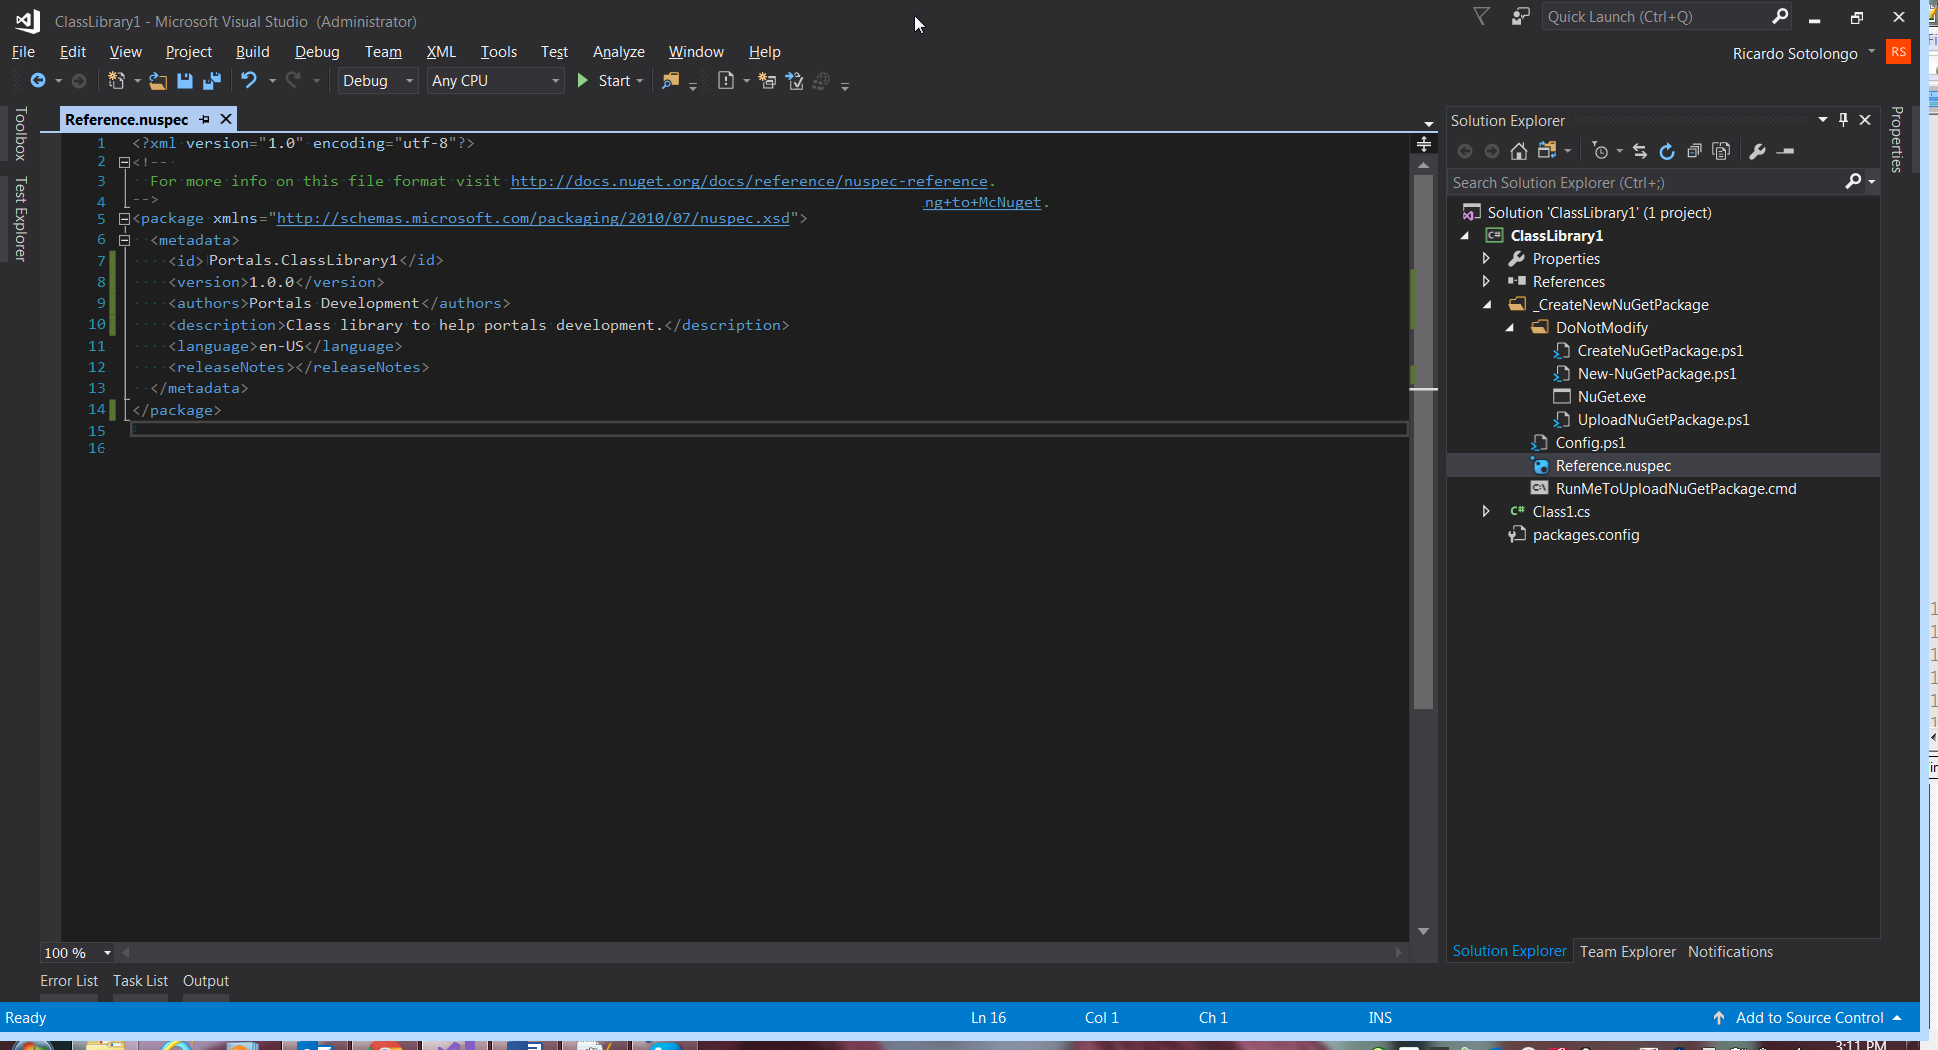
Figure 14.
The content of this file depends of what you want for your package but as example:
|
|
Now the build results looks like figure 15.
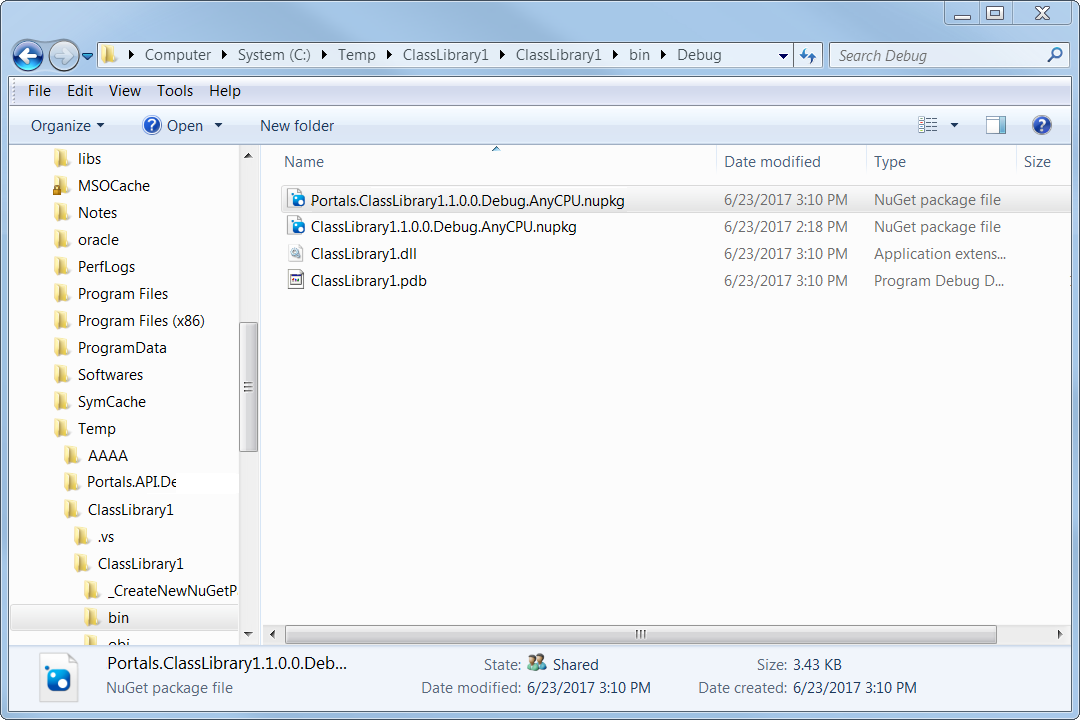
Figure 15.
Figure 16 shows the content of the new generated package, this time with more accurate metadata.
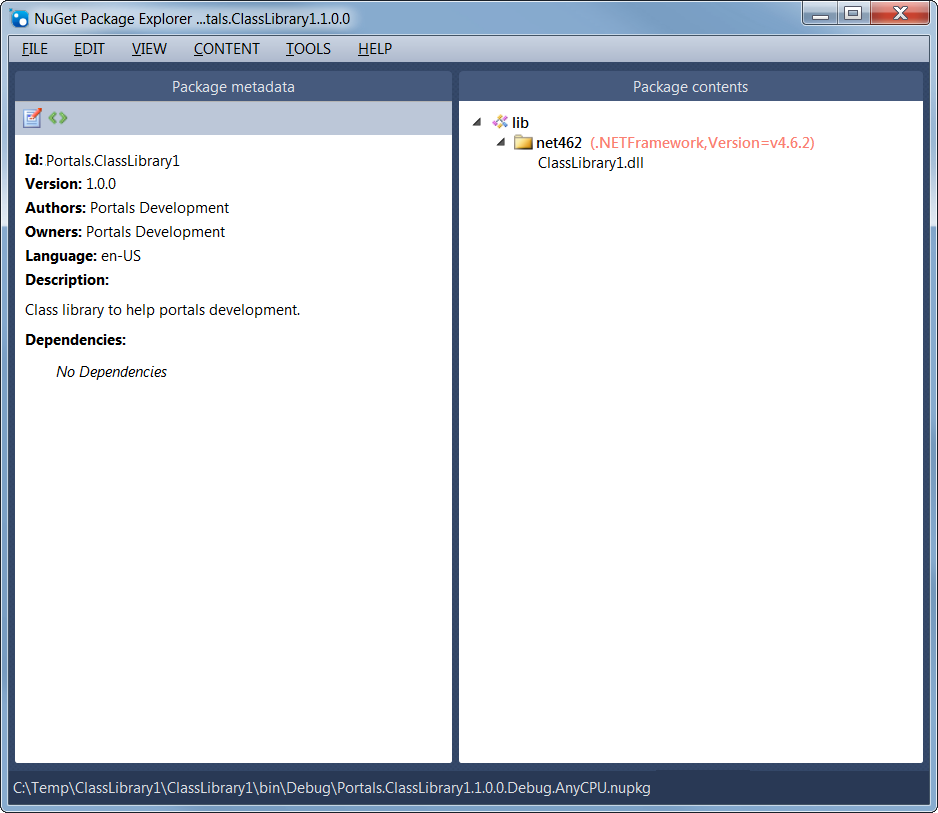
Figure 16.
At this point we were able to generate the package but what we really need is the possibility to consume it from another project. We need first to deploy it in an internal NuGet repository called: “McNuget”. Let’s explain how to do it.
First open “$(ProjectDir)_CreateNewNuGetPackage\Config1.ps1” and made the modifications highlighted in yellow color in figure 17.
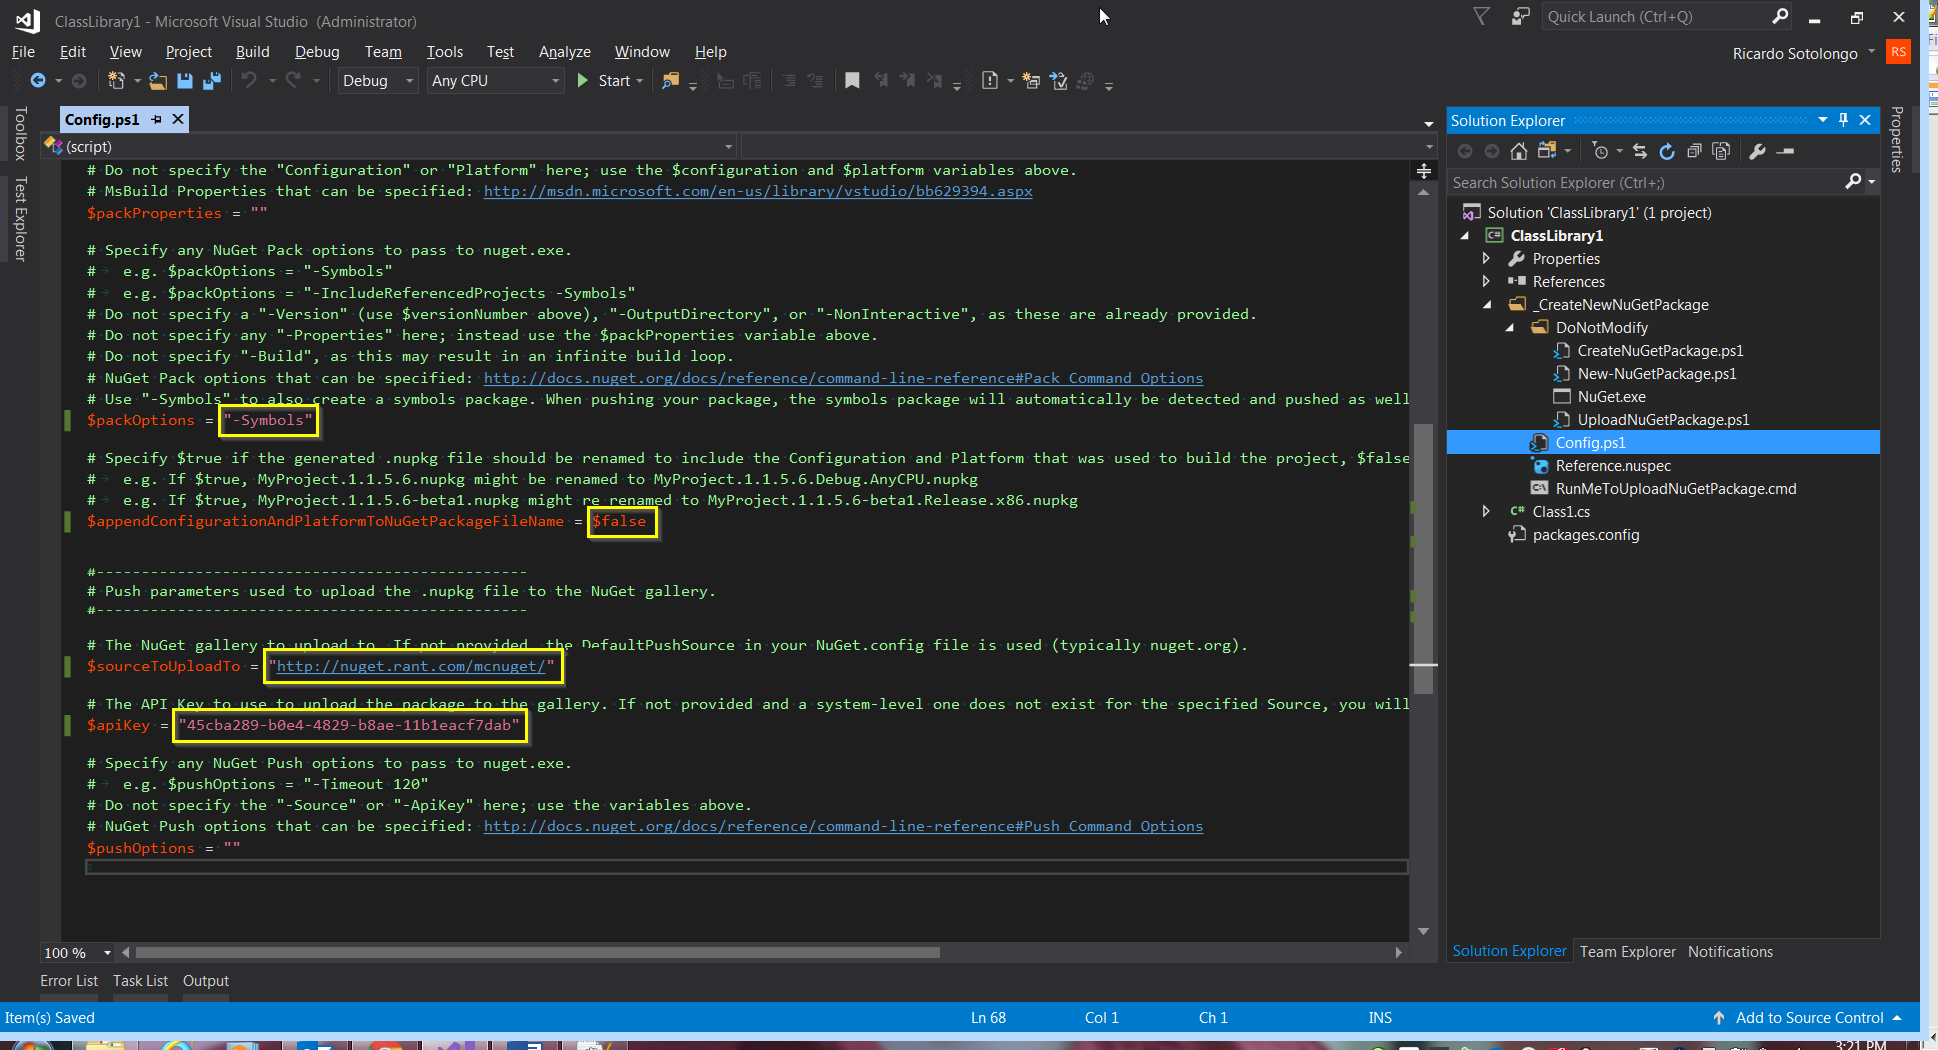
Figure 17.
Basically we are specifying that in every build generate another package that contain all debug symbols including source codes to facilitate the debugging of this package. Do not append the configuration and platform used to build into the package name. Also we will eventually deploy this package to McNuget (I say eventually because is not automatic in every build) and the API for deploy into McNuget. This API was generated by the administrator of McNuget and sent it to us.
Figure 18 shows the result of the build.
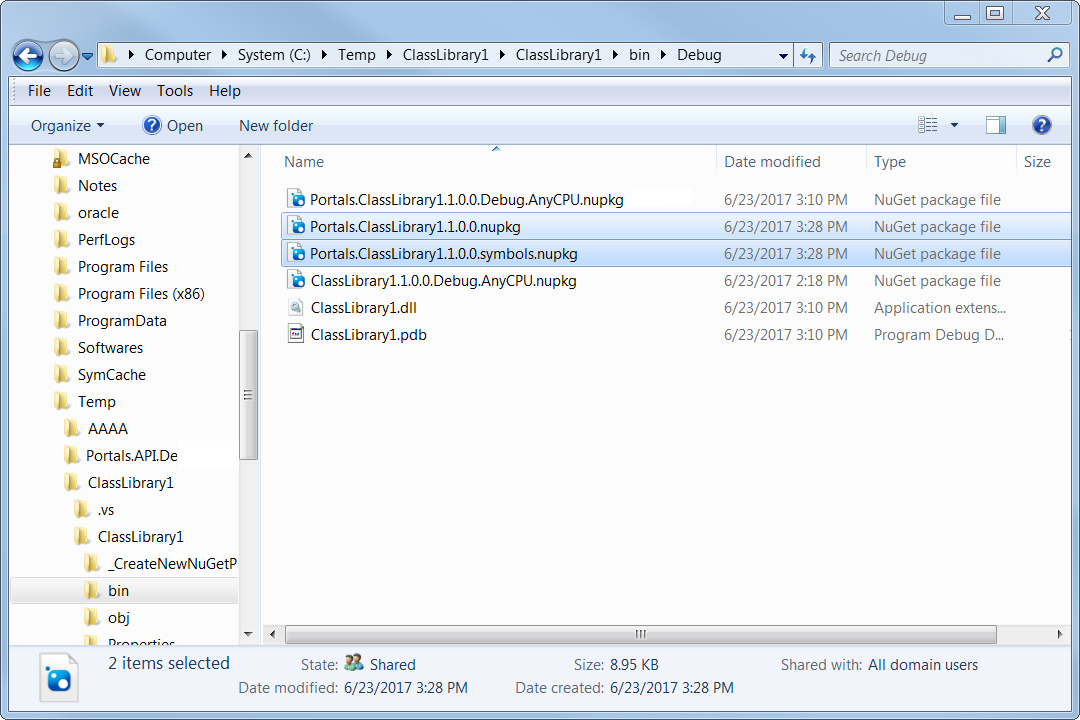
Figure 18.
Notice the new two packages without the configuration and platform; one without debug symbols (same than figure 16) and other with symbols and source code as figure 19 shows.
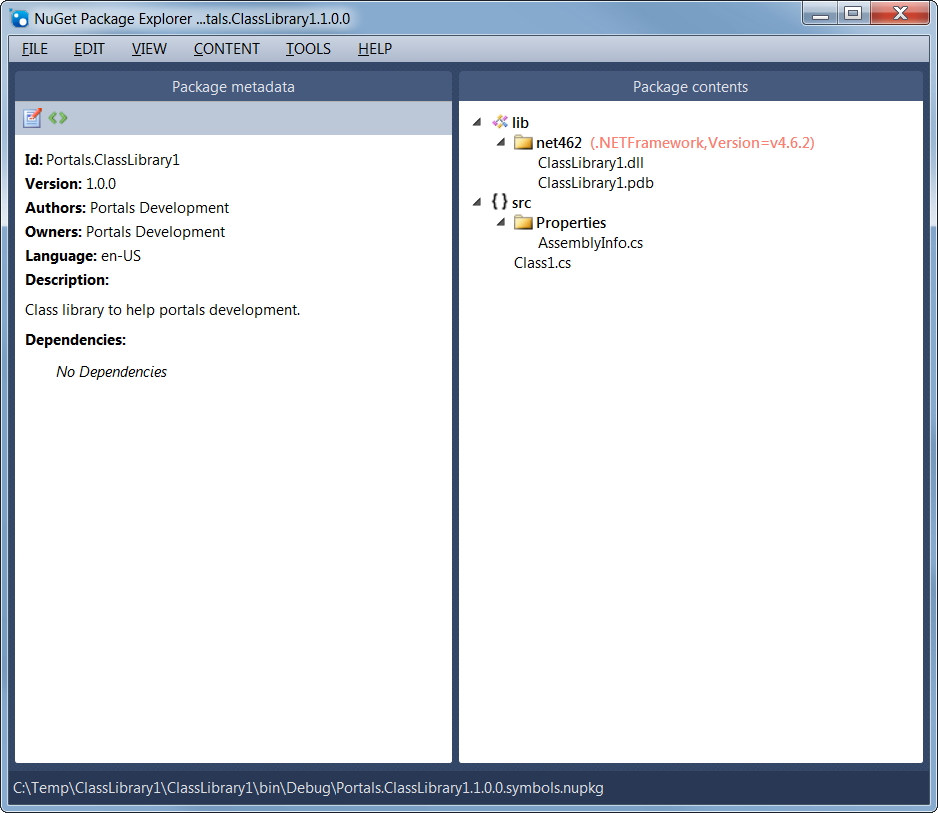
Figure 19.
Is time to deploy the package into McNuget and to do this we need to execute “$(ProjectDir)_CreateNewNuGetPackage\RunMeToUploadNuGetPackage.cmd” as is shown in figure 20.
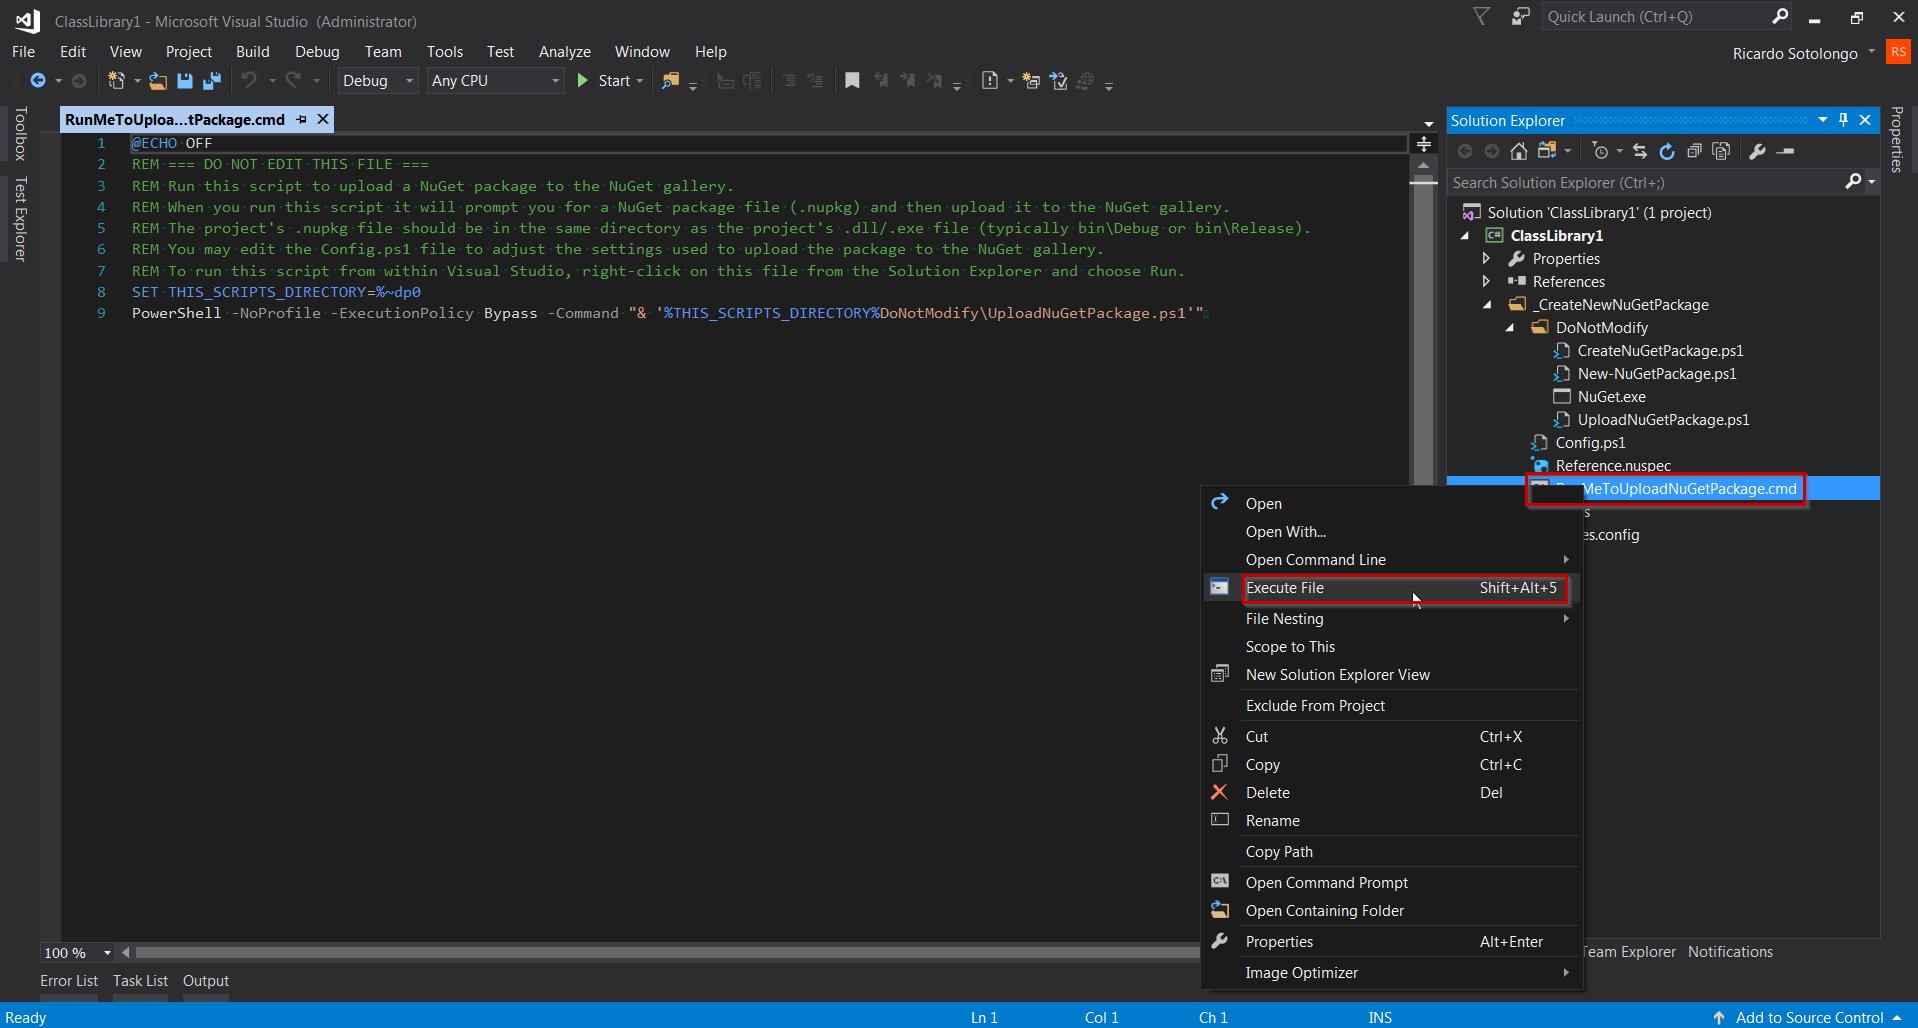
Figure 20.
Once is executed it will open a command line window and a dialog asking for the package to deploy as is shown in figure 21.
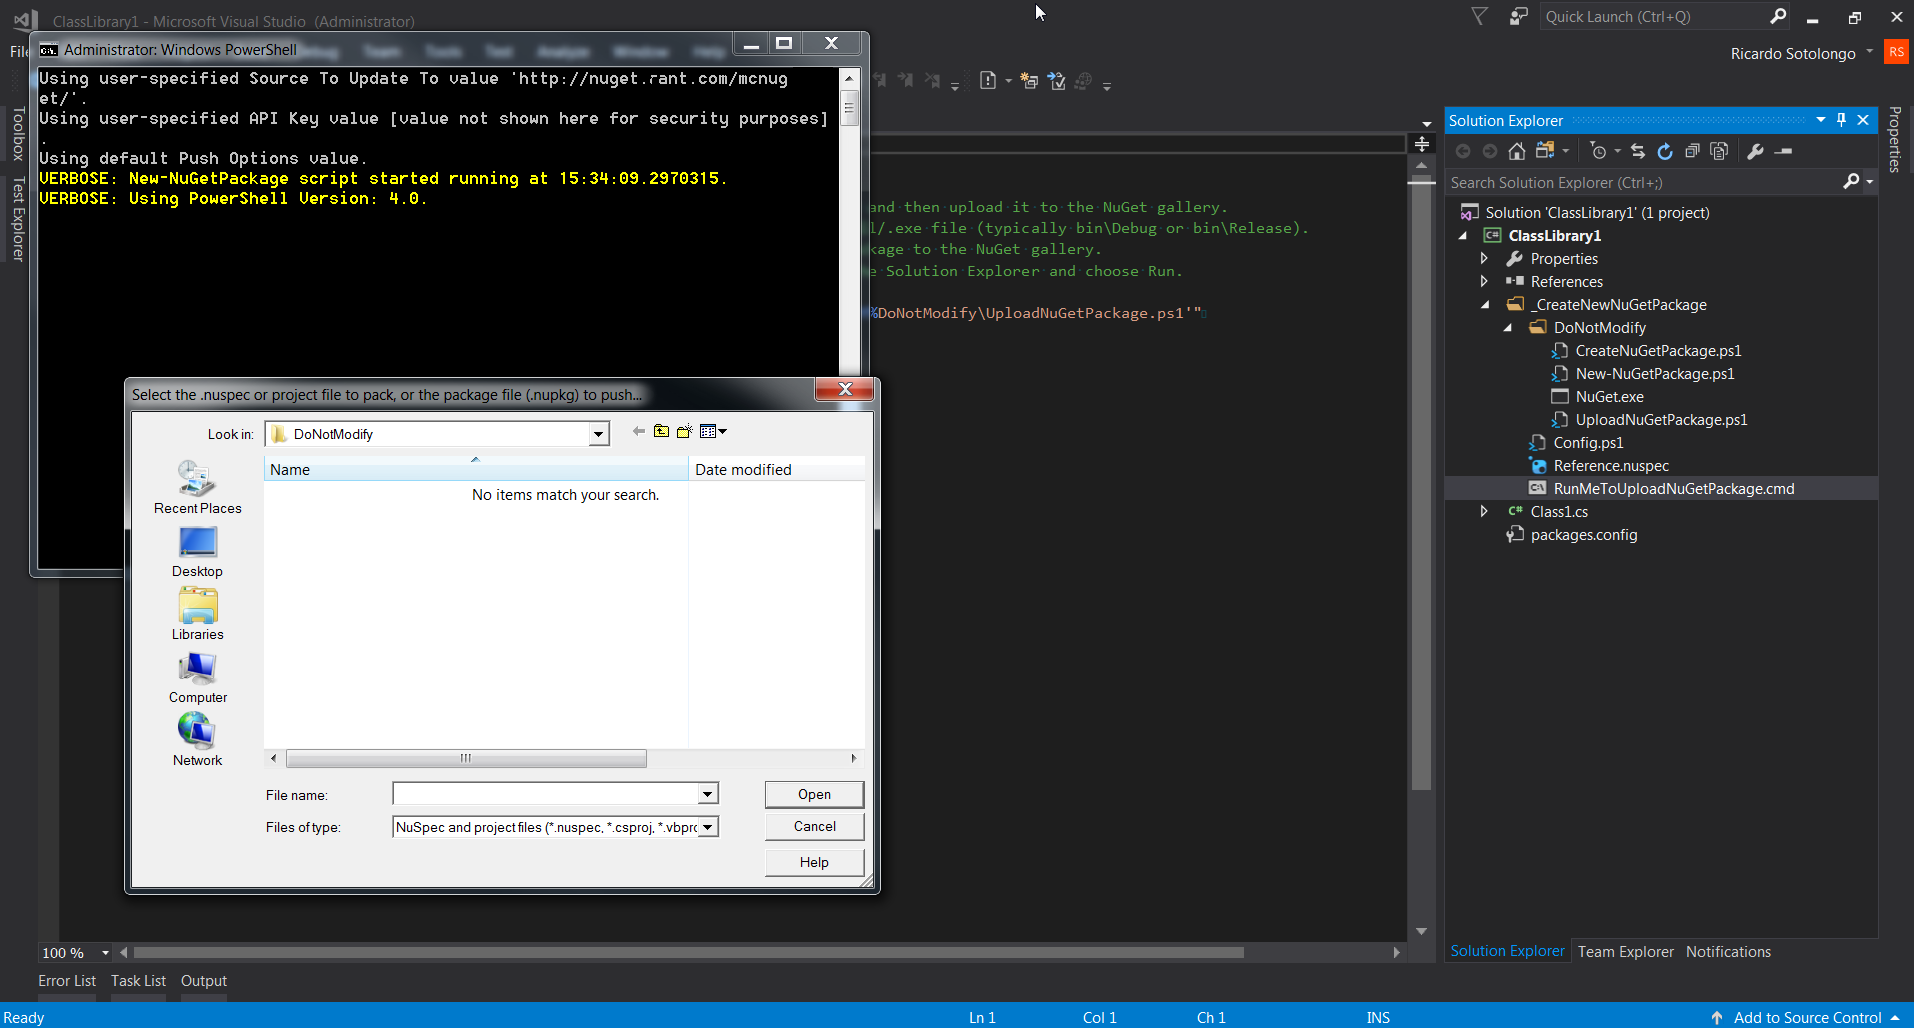
Figure 21.
Once the package is selected as is shown in figure 22…
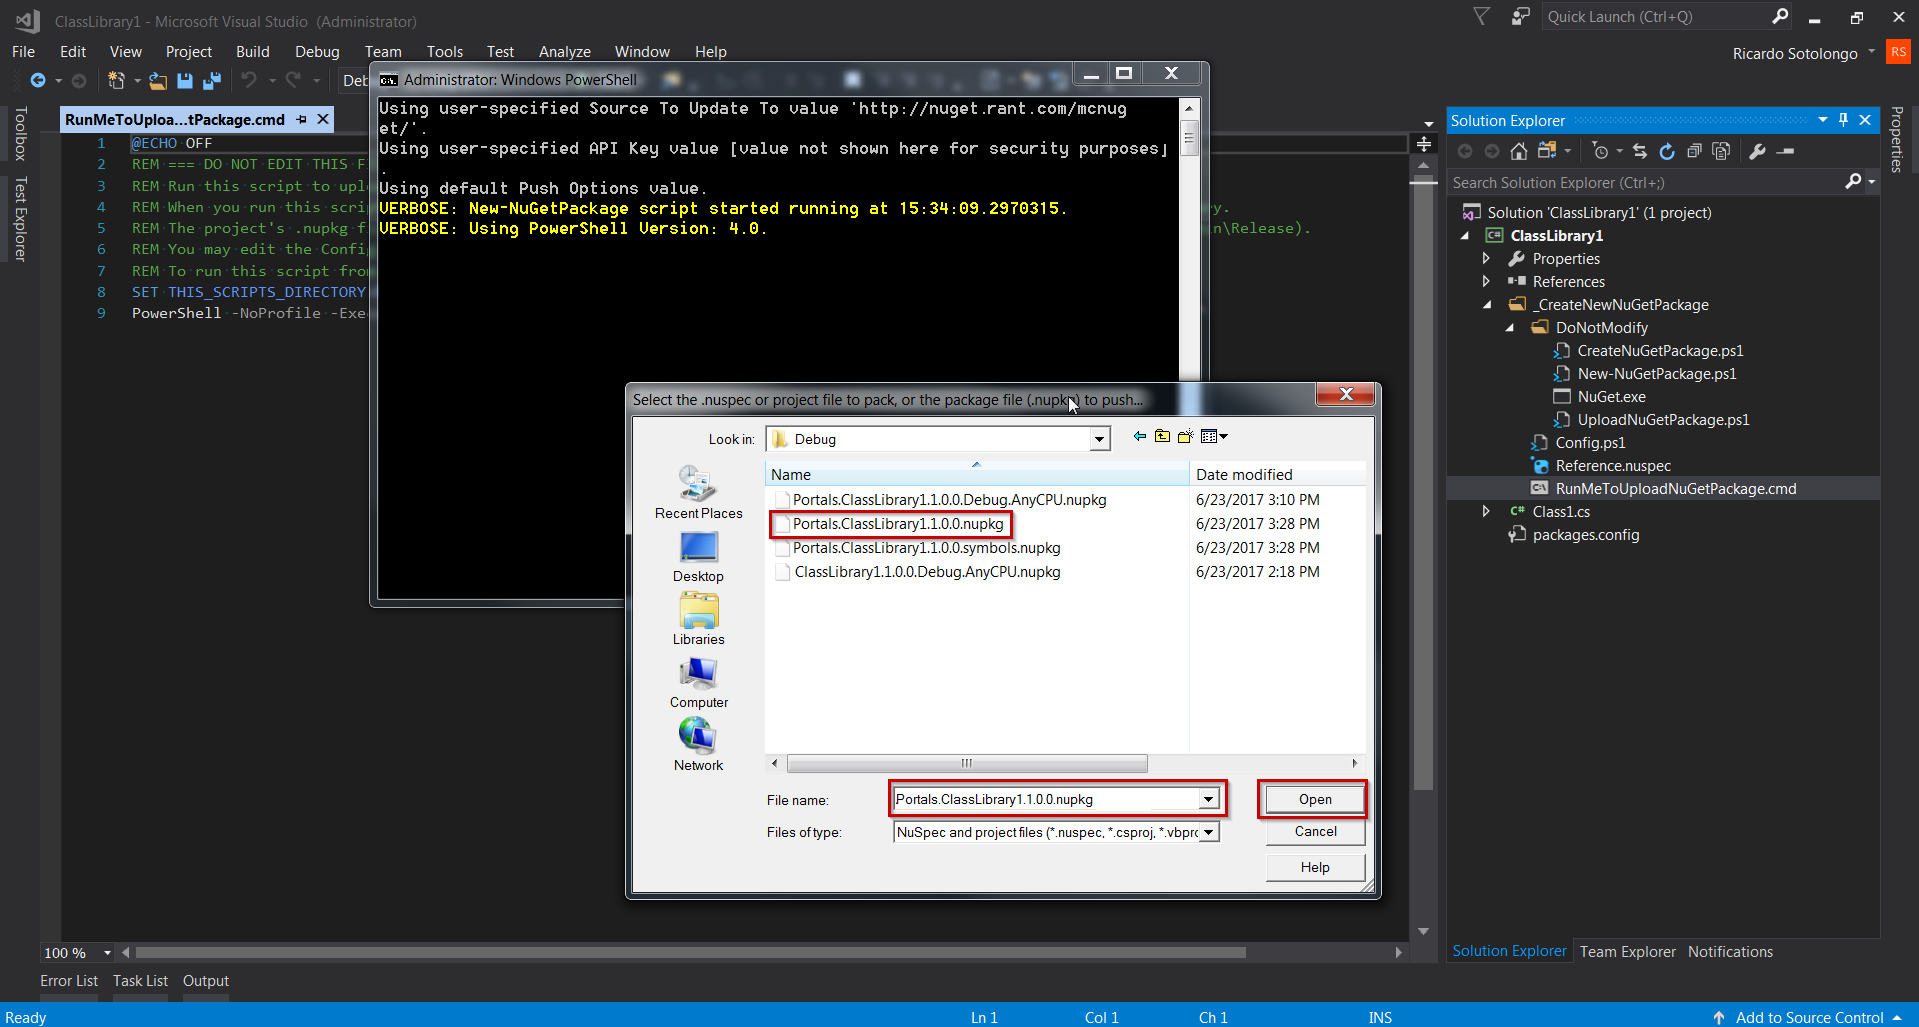
Figure 22.
…it ask for a confirmation as figure 23 shows. One valid point to mention is that McNuget repository could be not configured to allow deployments of packages containing debugging and source code symbols. So the only option we can deploy is the regular package.
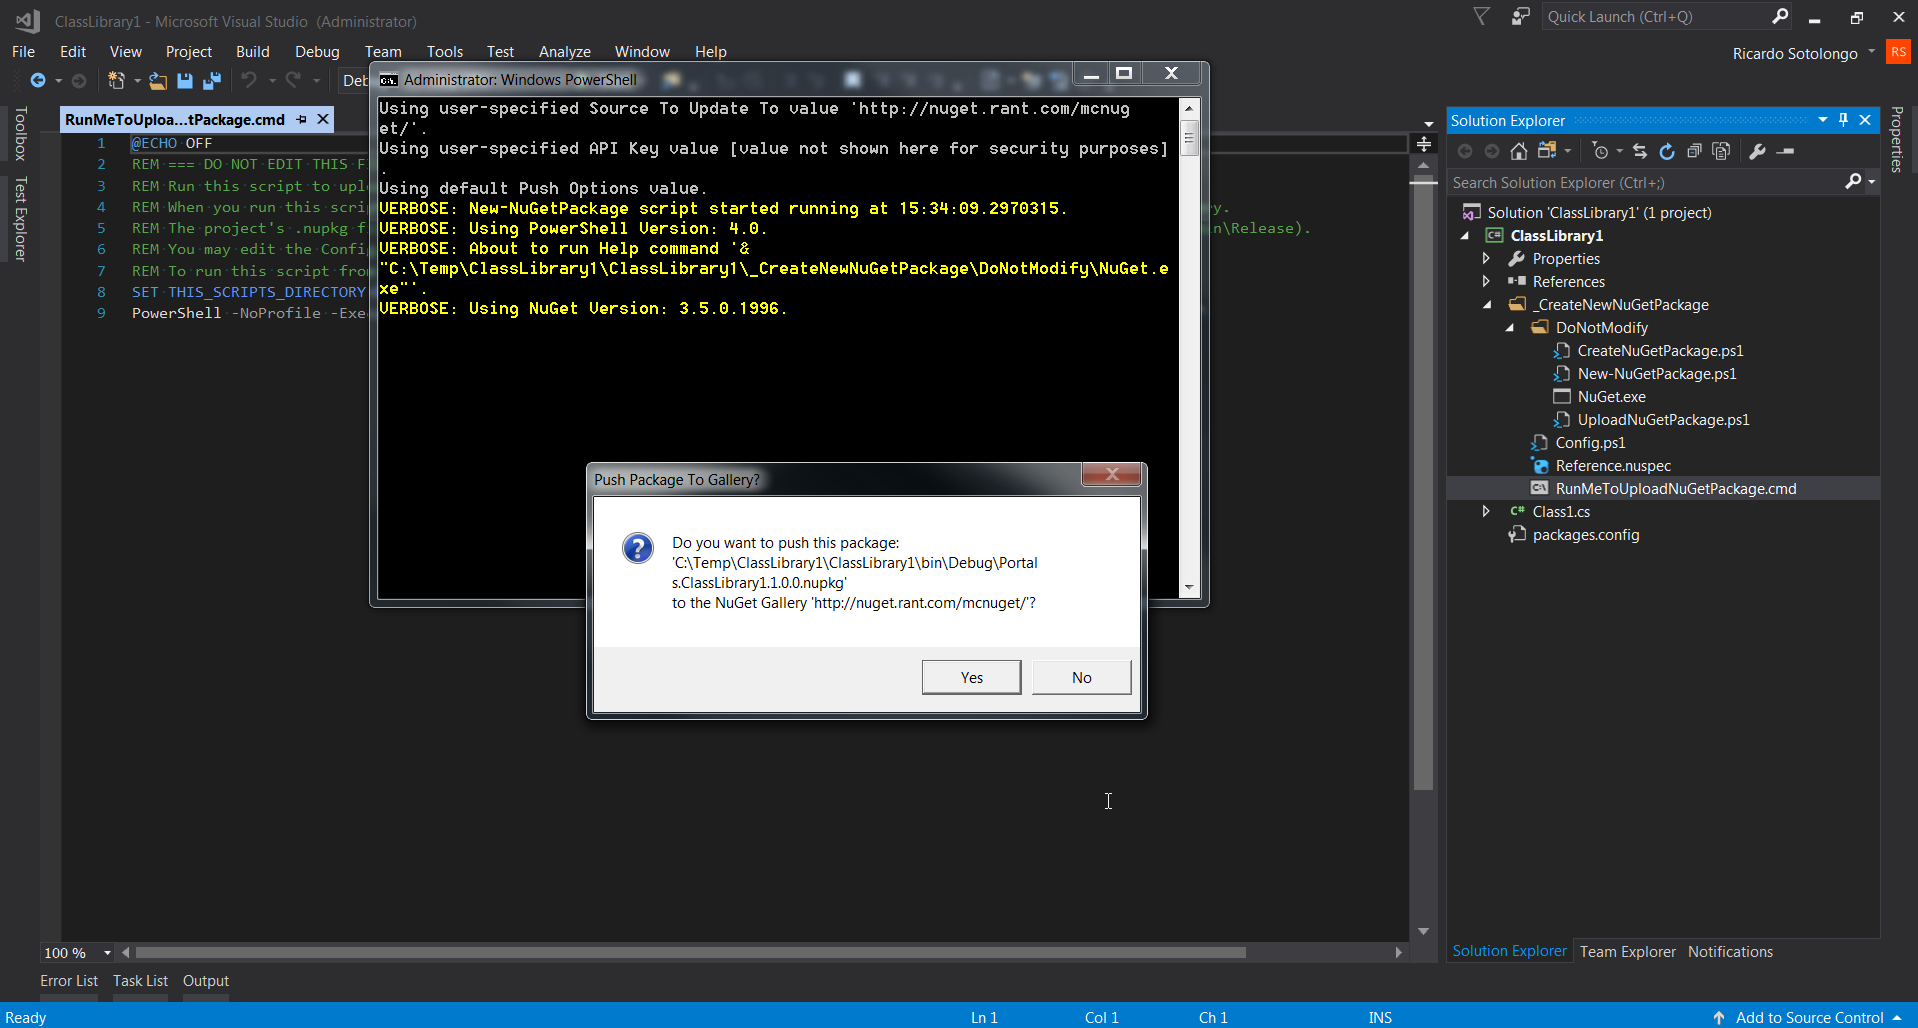
Figure 23.
Once is accepted and if everything was OK, we should be able to see a screen similar to what figure 24 shows.
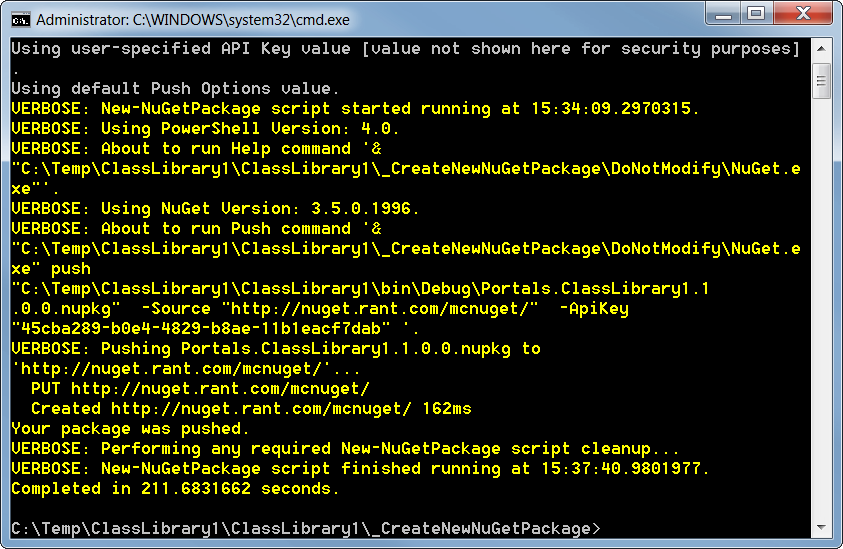
Figure 24.
Meaning that our package is in McNuget ready to be use. Let’s test it.
Figure 25 shows the package management for another project.
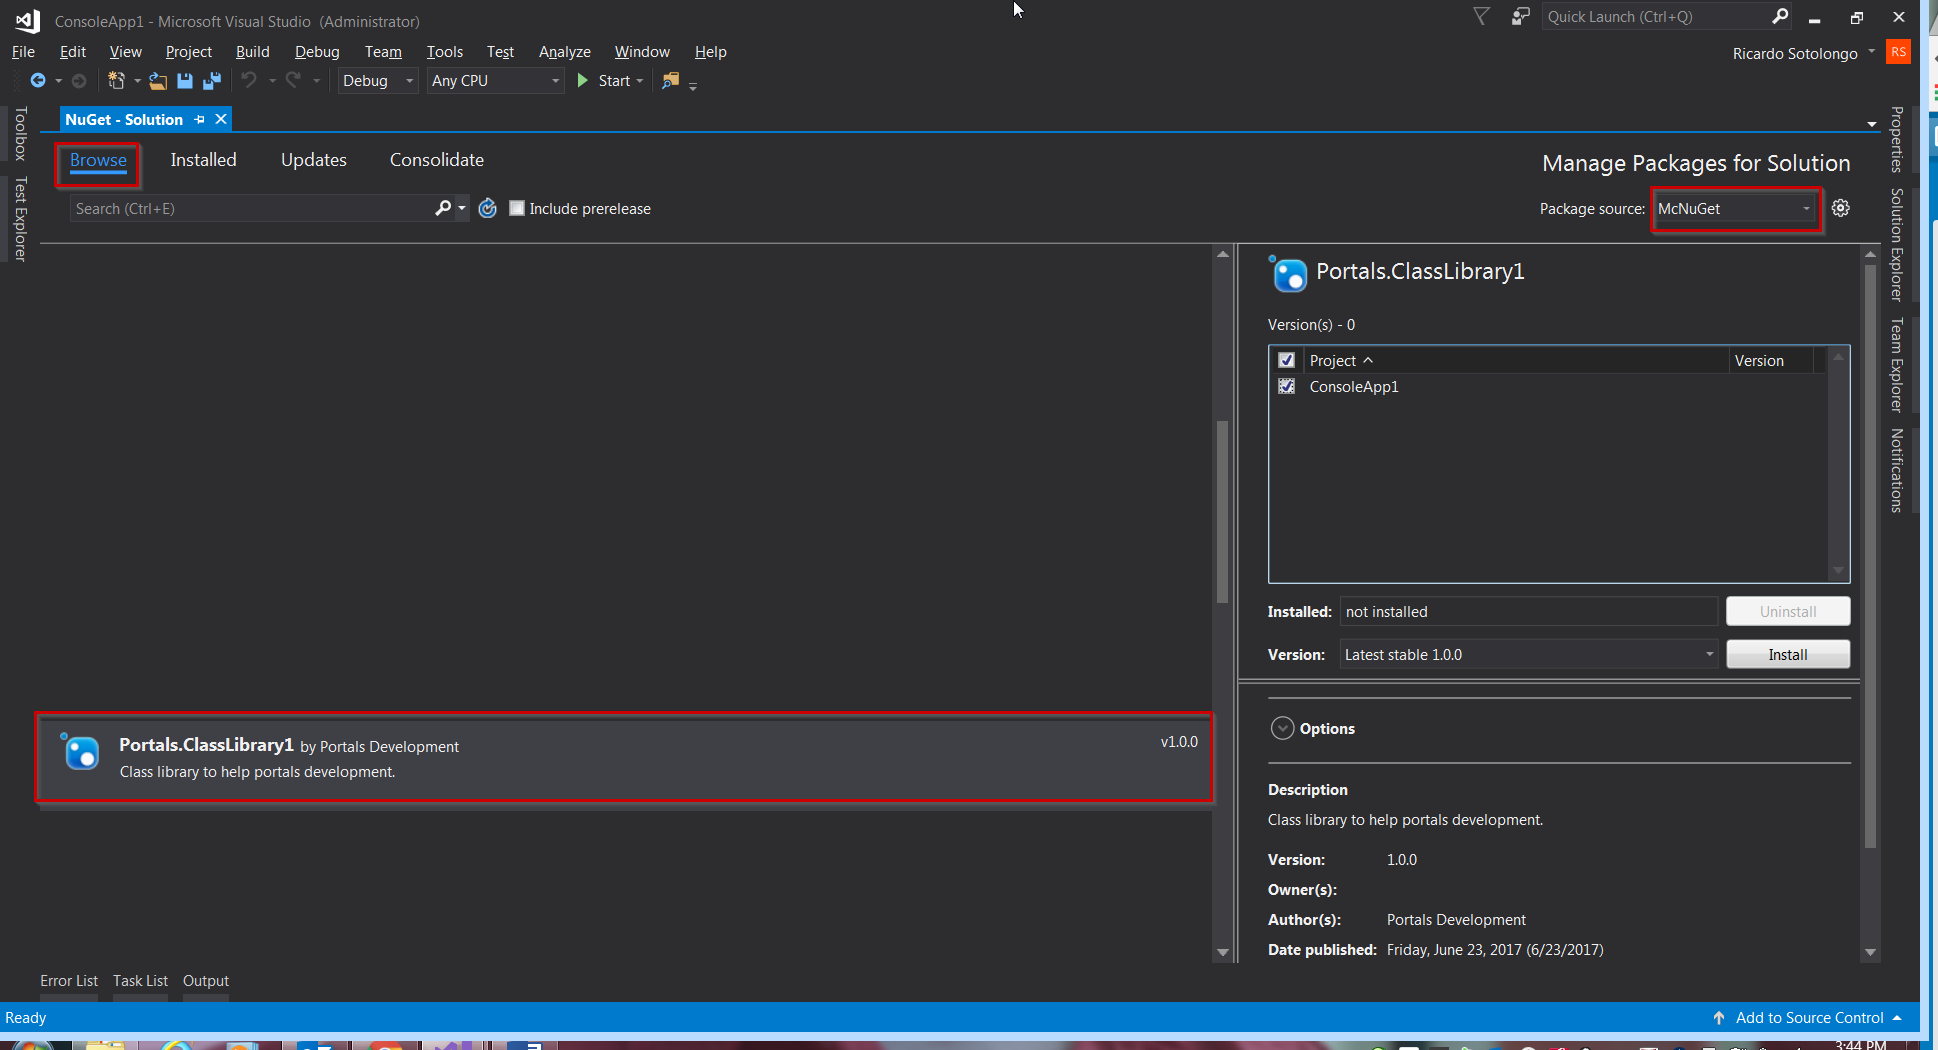
Figure 25.
Once the package is installed we can use its features. Figure 26 shows an example.

Figure 26.
One last observation, we have deploy the regular package because hypothetically McNuget don’t allow to deploy packages with debugging symbols; but we have deployed the version built in “Debug” mode and this is not good, we suppose to deploy the version built in “Release” mode and gain more performance.
This is everything I have to share with you today. Hopefully you find this guide useful for your projects once you want to generate NuGet packages.