Source code of support available at GitHub
Sometimes assemblies (executables and libraries) are required to be sign and I don’t have a certificate available for test purpose. In this post I pretend to show how to generate a certificate to sign assemblies.
First, we need to install OpenSSL that we can achive following the steps specified in the next link:
Installing OpenSSL on Windows 10 and updating PATH
Second, let’s create a batch script file called: “generateCertificate.cmd” with content:
|
|
Roughly we create a folder (called: “Certificate”) and make it the working directory. After we create a file writing its content line by line. Finally, in several steps, we use tool: “openssl.exe” to generate the certificate. Notice the double quotes surrounding the password value due to it contains the special character ampersand (&). The source code for that file could be downloaded from this GIST.
Assuming that we have copied it into folder: “C:\Temp”, let’s see what it does through the analysis of figure 1 representing its execution.
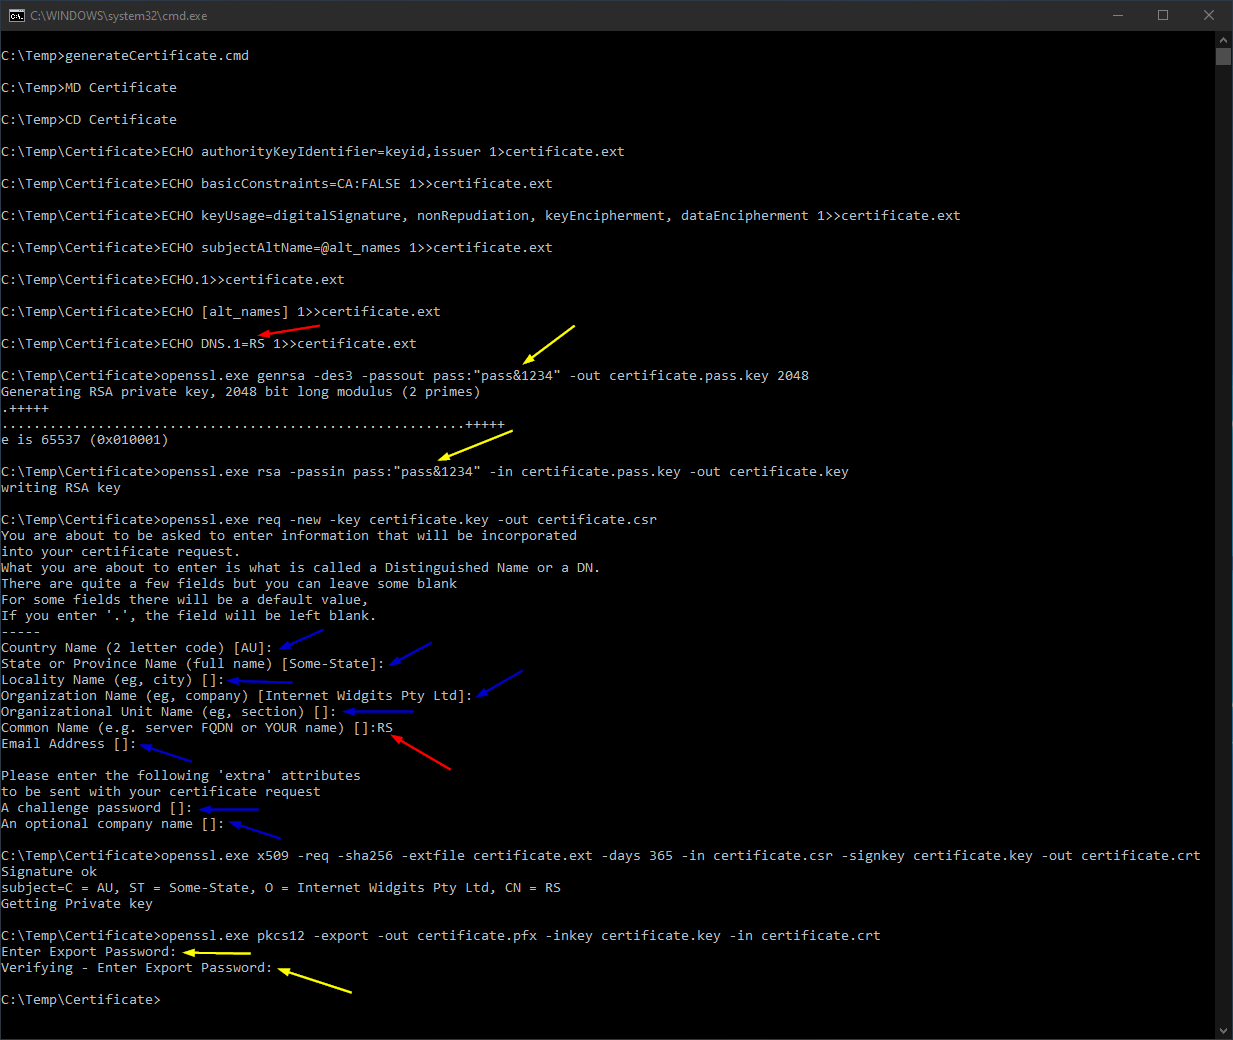
Figure 1: Script execution.
The steps to pay more attention are indicated with red and yellow arrows while there are other optional steps indicated with blue arrows. The first red arrow is the common name that we choose for the certificate. This must to be the same value that we have to enter once the script asks for a value in the second red arrow.
Yellow arrows are the password chosen for the certificate. While the first two values are specified in batch file: “generateCertificate.cmd”, the last two values have to be introduced manually when are requested. Tool: “openssl.exe” hides those values while are typed but they must to be match.
Once all steps end successfully we can see the result in figure 2.
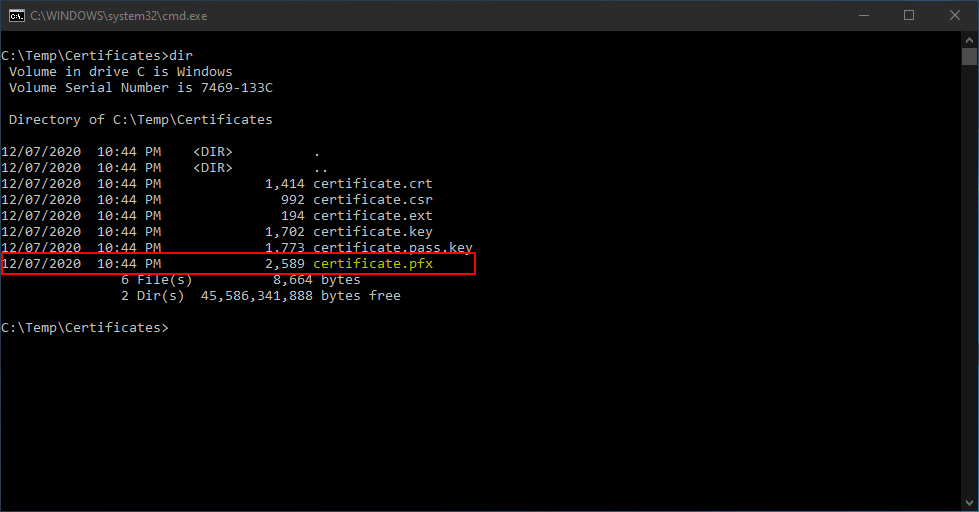
Figure 2: Resulting certificate.
That is a certificate we can use to sign assemblies (a process I will explain in a later post).